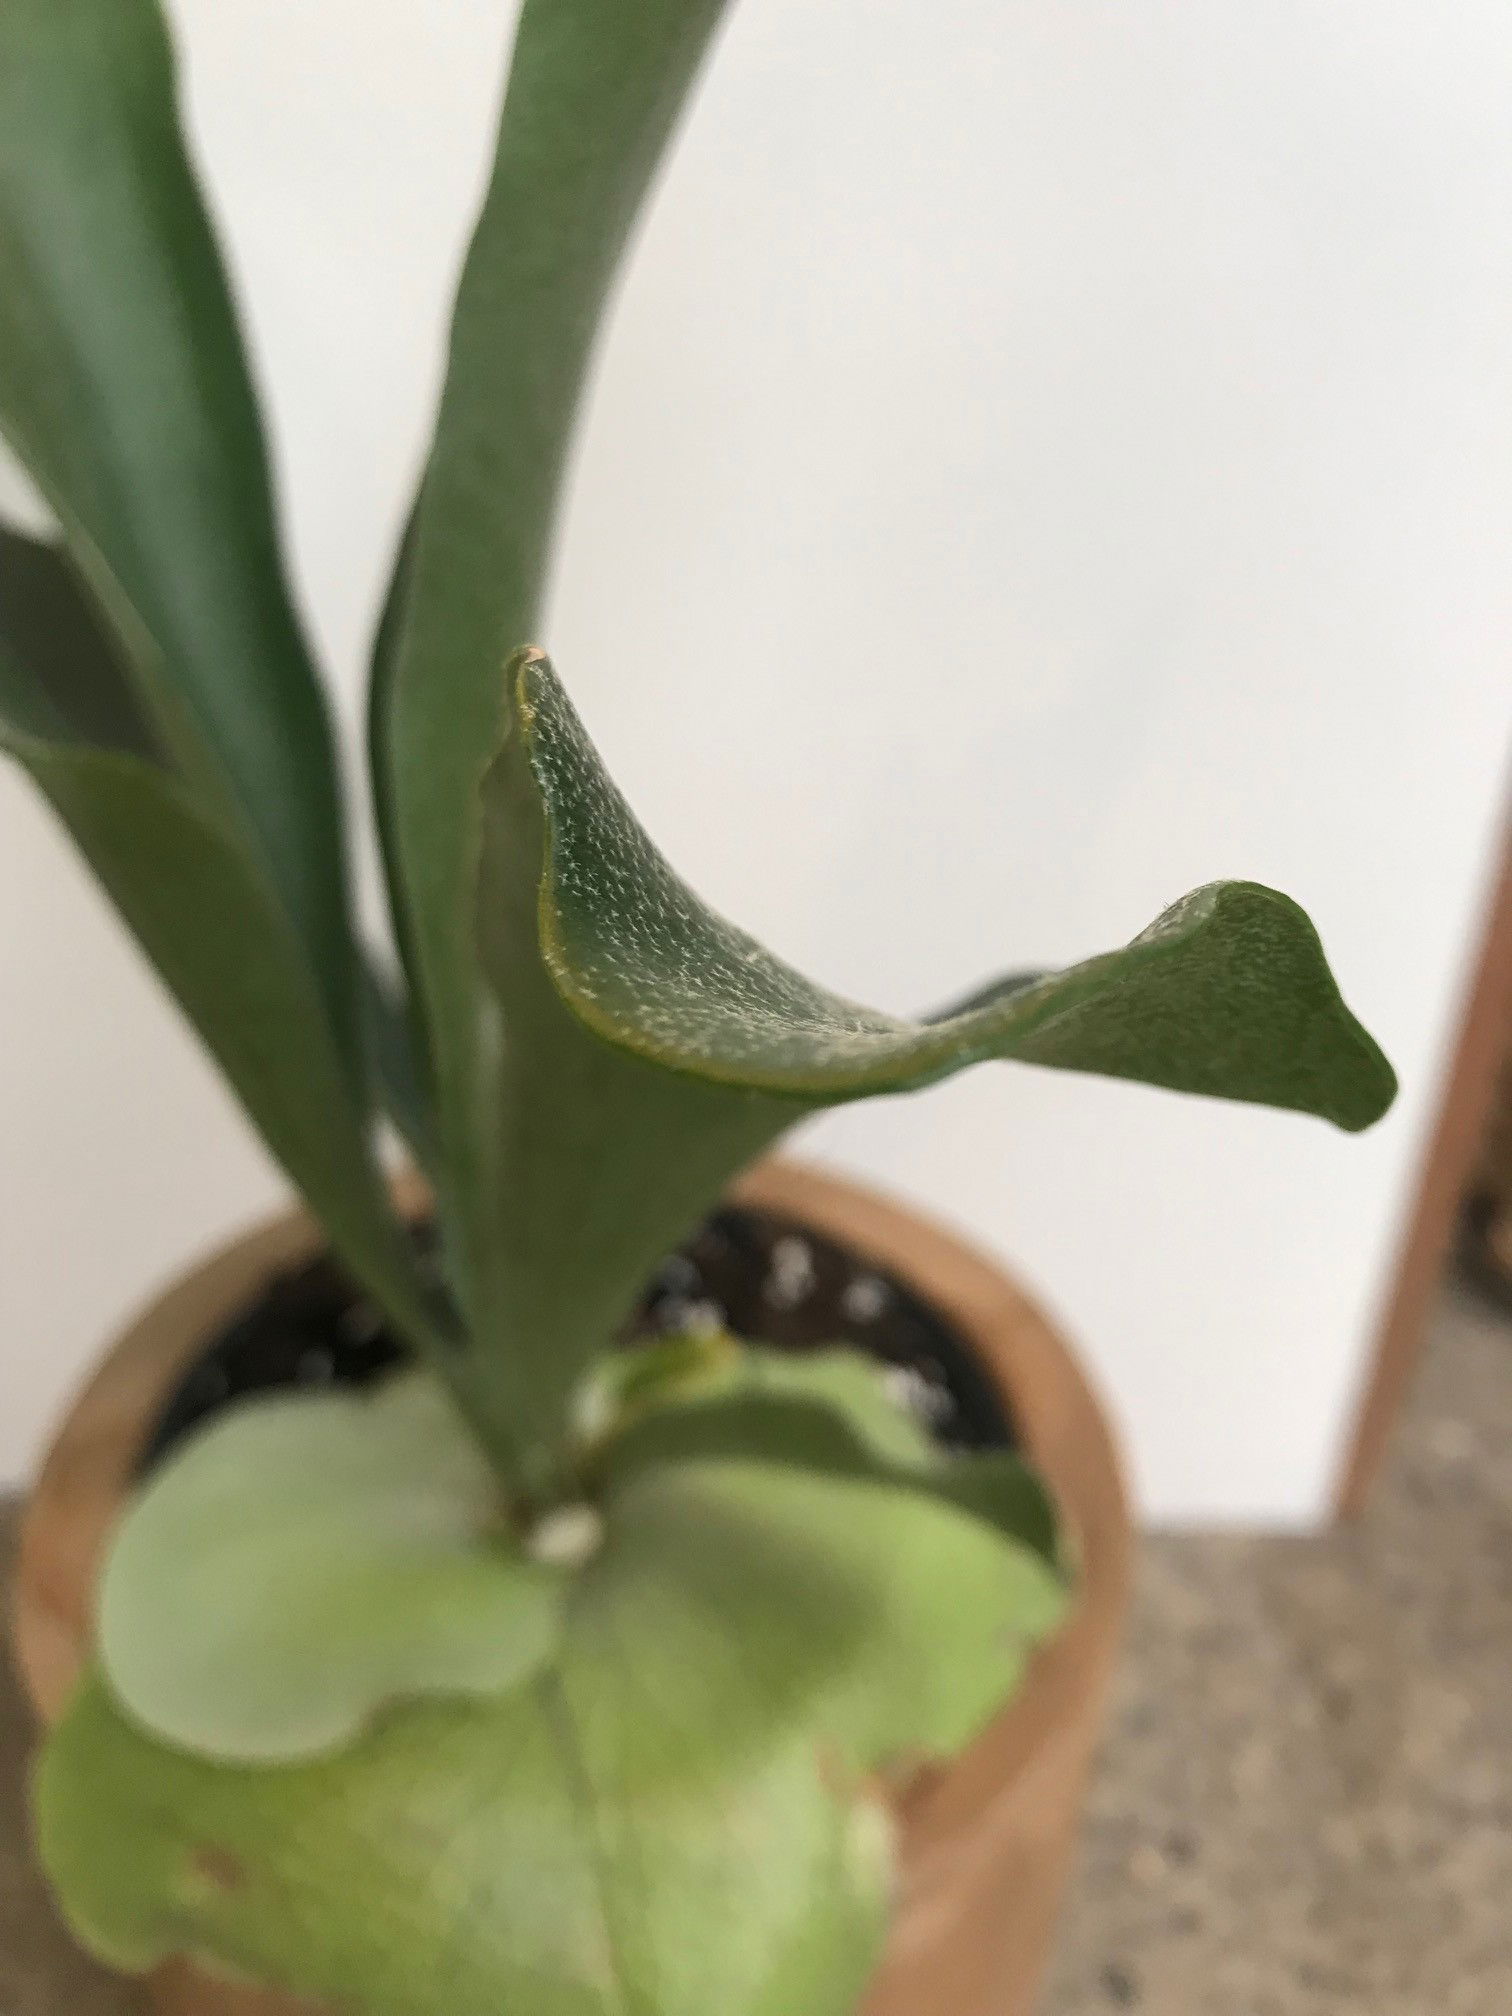
Platycerium superbum
Contents
- Top Tips
- Location, Water, Humidity & Fertilisation
- Common Issues
- Origins, Temperature, Propagation, Repotting & Toxicity.
Need the answer to a specific plant query? Book a 1-to-1 video call with THE HOUSEPLANT DOCTOR™, the website's friendly author, to overcome and address your niggling problem! Available on iMessage, WhatsApp, Facebook Messenger & more.
Top Tips & Info
- Care Difficulty - Moderate
- Provide a bright environment with a splash of either morning or evening sun. Avoid dark locations at all costs due to the heightened chance of basal rot.
- Submerge the plant's base (basal fronds) in lukewarm water for several minutes every seven to ten days, or shower its foliage for hydration. If placed in compost, allow the top third to dry out in between waters, feeling the pot's lightness for confirmation of drying soil.
- Supplement every six weeks using a 'Houseplant' feed, mixing a few drops into the water before submerging the plant during a drink.
- If the basal frond outgrows its plank, nail a slightly larger board onto the back, resisting the temptation to remove it wholly. Tinkering with its root system may result in transplant shock and death.
- Keep an eye out for Rhizoctonia or basal softness as both are a terminal disease that's caused by an excess of moisture in the plant's main body.
Location & Light - 🔸🔸
Perfecting the amount of light a Staghorn Fern receives is crucial for a long-lasting specimen. During the spring and summer, be sure to provide a brightly lit spot away from any direct light. Excessive exposure during this time will negatively affect the plant in the likes of sun-scorch and dehydration. Once the autumn kicks in, be sure to include an hour or two of direct light per day to get it through the dormancy period, lasting until the following spring.
Water - 🔸
Staghorn Ferns are either epiphytic or lithophytic, meaning that they naturally grow on trees or rocks. With this in mind, it's recommended to allow most of the basal fronds to dry out between waters, reducing this further in the autumn and winter. Hydrate your specimen by submerging its base for several minutes in lukewarm water once a week, before lightly shaking it to remove any excess moisture from its cubbyholes - reduce this to every ten days in the autumn and winter months. If it's situated in soil, allow the top third to dry out in between waters, reducing this further in the autumn and winter. It's always better to under-water a Staghorn Fern than over-do it, purely because of its reduced ability to endure prolonged sogginess.
Under-watering symptoms include crispy foliage, little to no new growth and drying basal fronds. Although dried basal fronds are part of the plant's life cycle, if exaggerated crispiness is accompanied with zero growth, it may indicate a much-needed change of cultivation. Dehydration is a common issue among specimens grown in sun-filled environments.
Over-watering symptoms include the antler fronds beginning to brown or blacken at the base, leaf spot disease, powdery mildew and little to no growth. These issues are all caused by an excess of moisture in the rhizomes or around the plant itself. Never allow the specimen to remain wet for long periods; their natural habitats are generally dry, so try to emulate this in the home. Remember the golden rule of less heat/light will equal to less watering or misting.
Humidity - 🔸🔸
A steady, moist environment is crucial for Staghorn Ferns. We'd recommend misting the larger antlers' undersides once a week, especially while the heaters are operating.
One word of advice would be not to mist too often - a combination of too little light and excess moisture can lead to Rhizoctonia and an array of leaf-spot diseases.
Fertilisation - 🔸🔸
Supplement using a 'Houseplant' fertiliser every six weeks to aid quality growth. Over-supplementation should not be performed due to the susceptibly of root burn and yellowed foliage when excess fertiliser salts are allowed to build in the soil.
 A 19th-century illustration of a South American Platycerium andinum, located right of the photo. Copyright: alamy.com
Common Issues with Staghorn Ferns
Curled leaves and brown leaf-edges are the result of too little water and over-exposure to the sun. Staghorn Ferns are best located in bright, indirect settings, and those that haven't acclimatised to the harsh rays will show signs of sun-scorch and environmental shock. A splash of winter sunlight, however, is acceptable as long as the soil moisture is regularly observed, with complete avoidance once summer comes along. Cases of sun-scorch can be controlled by cutting away the affected areas and presenting a fern-friendly environment that consists of indirect light, moist air and good soil moisture.
A rotten core is usually accompanied by an array of collapsing antler fronds that can emit a foul odour over time. The common culprits of a rotten base include an excess of water in between hydrations, over-misting, too little light, water-logging, a lack of drainage holes or an incorrect soil medium used during transplantation. Unfortunately for Staghorn Ferns, this can, and often will lead to death as the plant's main body is harboured between the shield fronds and rootball, thus killing the plant from the inside out. If its base (rhizome) is still plump with signs of life, reduce the amount of water per week to allow oxygen to circulate its body. After a few weeks of better cultivation, remove the specimen from the soil/mount and replace the majority of the soil/sphagnum moss with a fresh batch to limit the spread of disease. Improve the air circulation and move to a slightly brighter location with no direct sunlight. As rehabilitation can take several months because of its slow-growing nature, be sure to provide a stable area with better growing conditions to speed this process.
Black roots are natural for Staghorn Ferns. Only treat for root rot if the soil smells 'earthy' and the roots feel collapsed or squishy. Click on this link to learn about this issue and what to do next!
An under-humid room will not favour ferns in the slightest. Humid air and an absence of dry soil are what keeps this species happy, so introduce a humidity tray to keep the local environment constant. Do not situate it within four metres of an operating radiator due to the threat of dry air and browned leaf-tips.
Due to the genus’ sensitivity to chemicals, Leaf Shine shouldn't be used to improve the appearance of the foliage, and instead should be cleaned via a gentle rinse with lukewarm water. Failure to do so may cause yellowed, mottled spots that cannot be undone.
Rinse the leaves regularly. Although this isn't too much of an issue, a build-up of dust particles can clog up the plant's pores, causing lowered light capturing-efficiency.
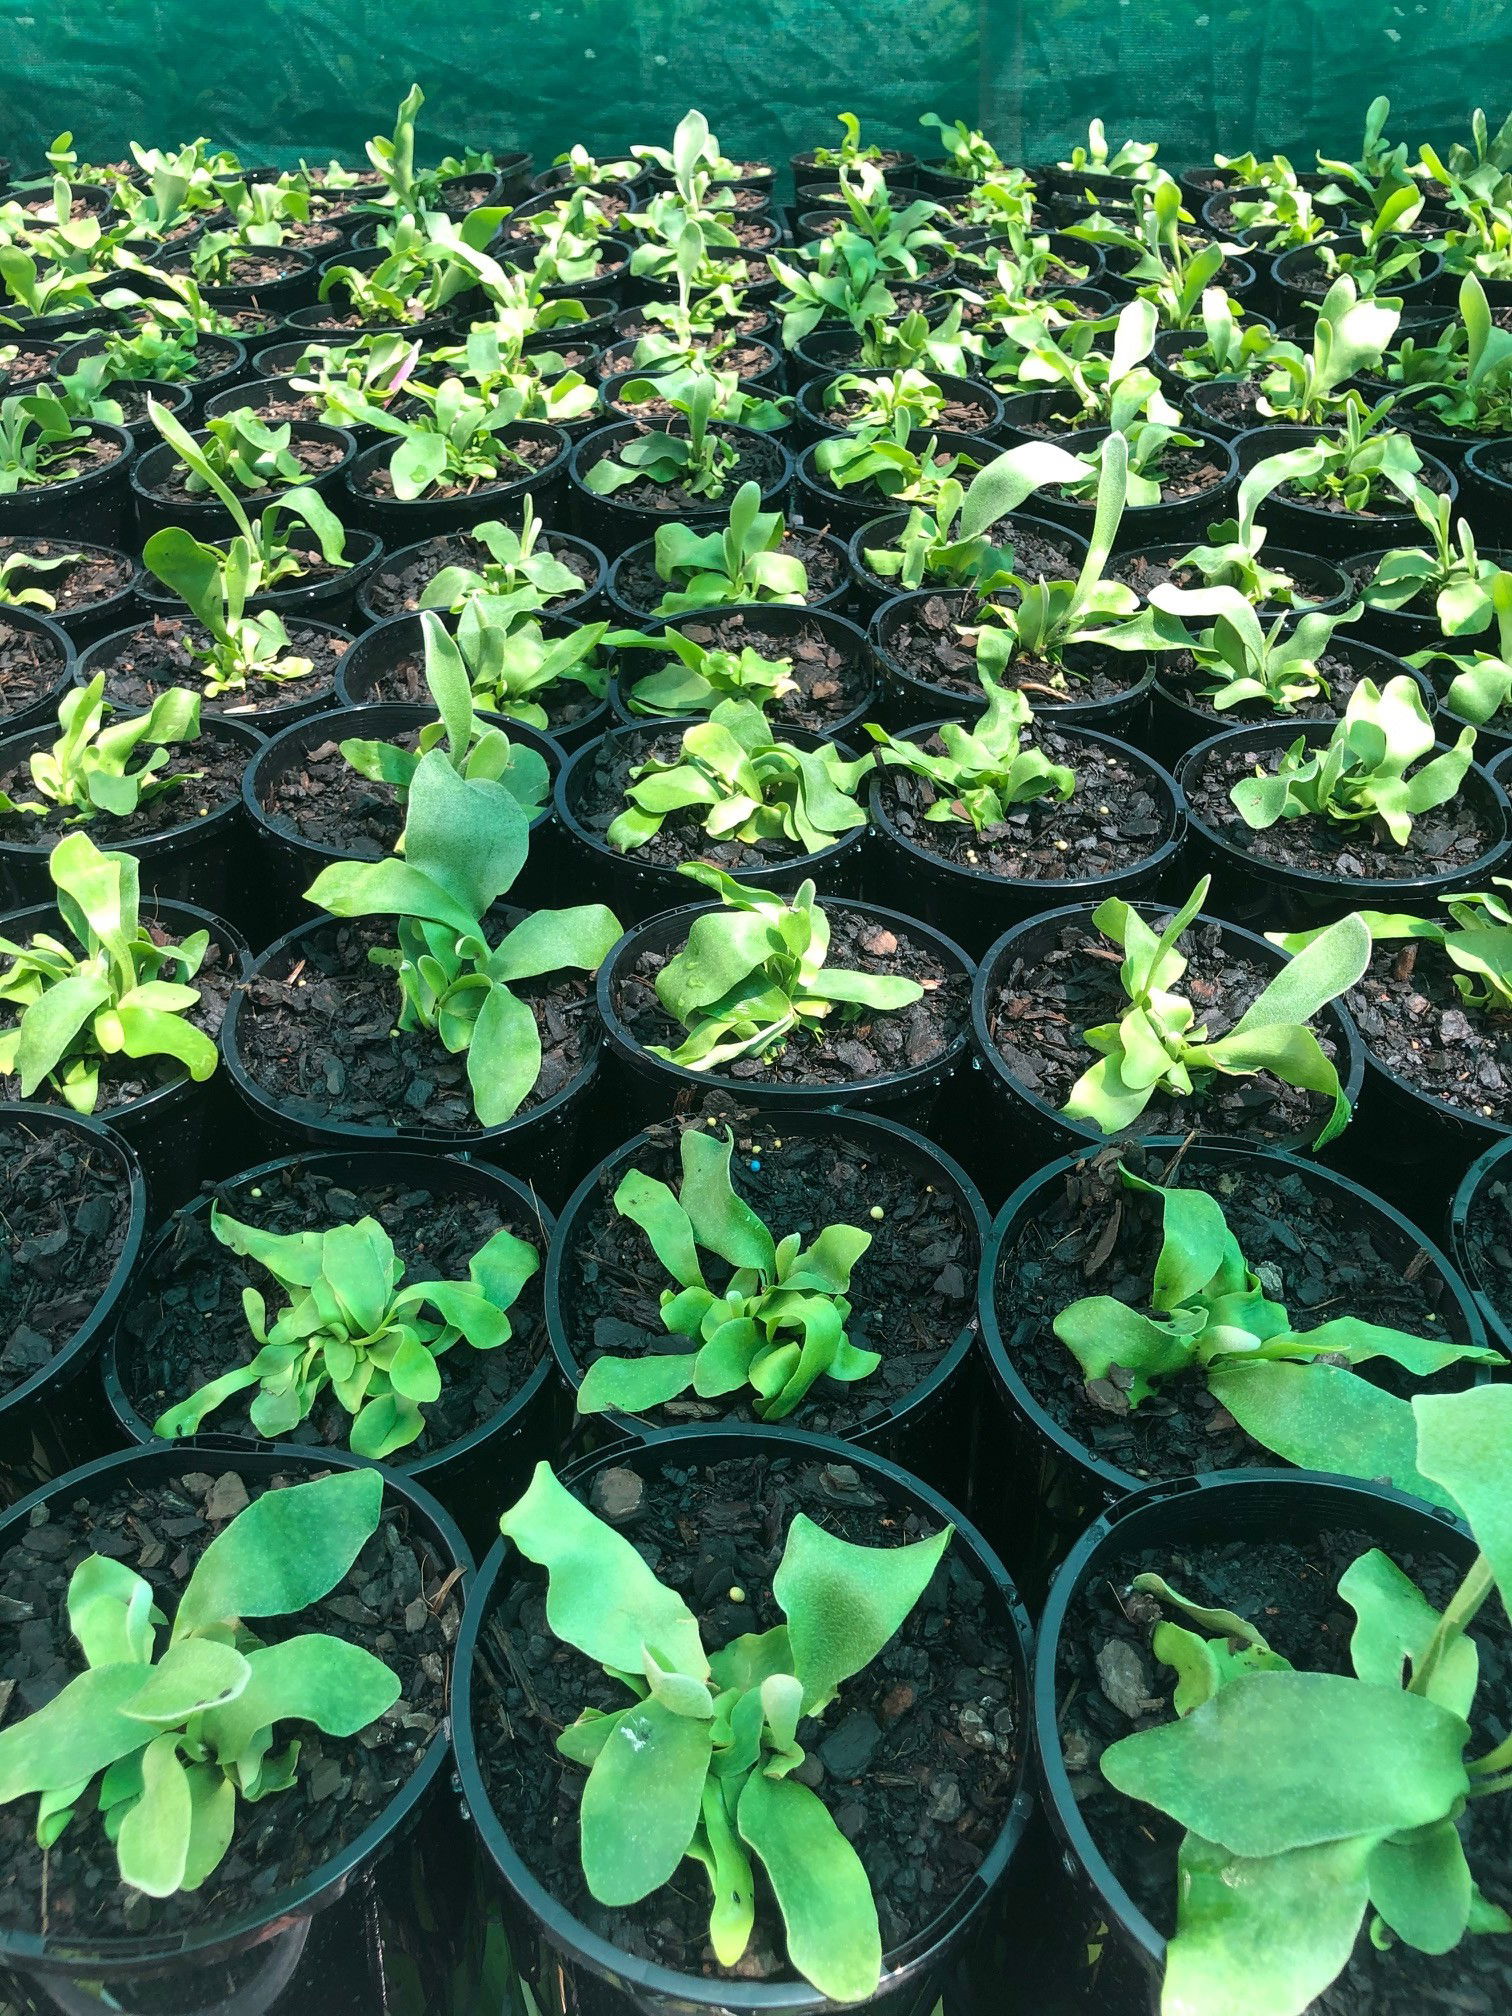 Mass produced Staghorn Ferns are now predominantly grown in soil due to the cost & transport benefits, compared to mounted displays.
Origins
There are eighteen species of Platycerium, all of which originate from tropical and temperate locations of South America, Australia, Africa and southeastern Asia. Its name derives from the Greek words, 'plats' & 'cera' which is in reference to the 'flat horn-like' fronds. Staghorn Ferns have been known to horticulturalists for over two hundred years, with evidence from a 19th-century illustration showing a large specimen that's anchored on a palm tree overlooking a small pond (pictured above).
The genus was first described back in the early 1820s by Nicaise Augustin Desvaux. The most popular species, P. bifurcatum, was classified ninety years later by Carl Christensen, using the plant's bifurcate structure of a matured leaf. The other species, P. superbum, was penned back in 1970 by Gerardus de Jonch. & Elbert Hennipman, using the Latin term for 'proud' that refers to the growth tendencies of the species.
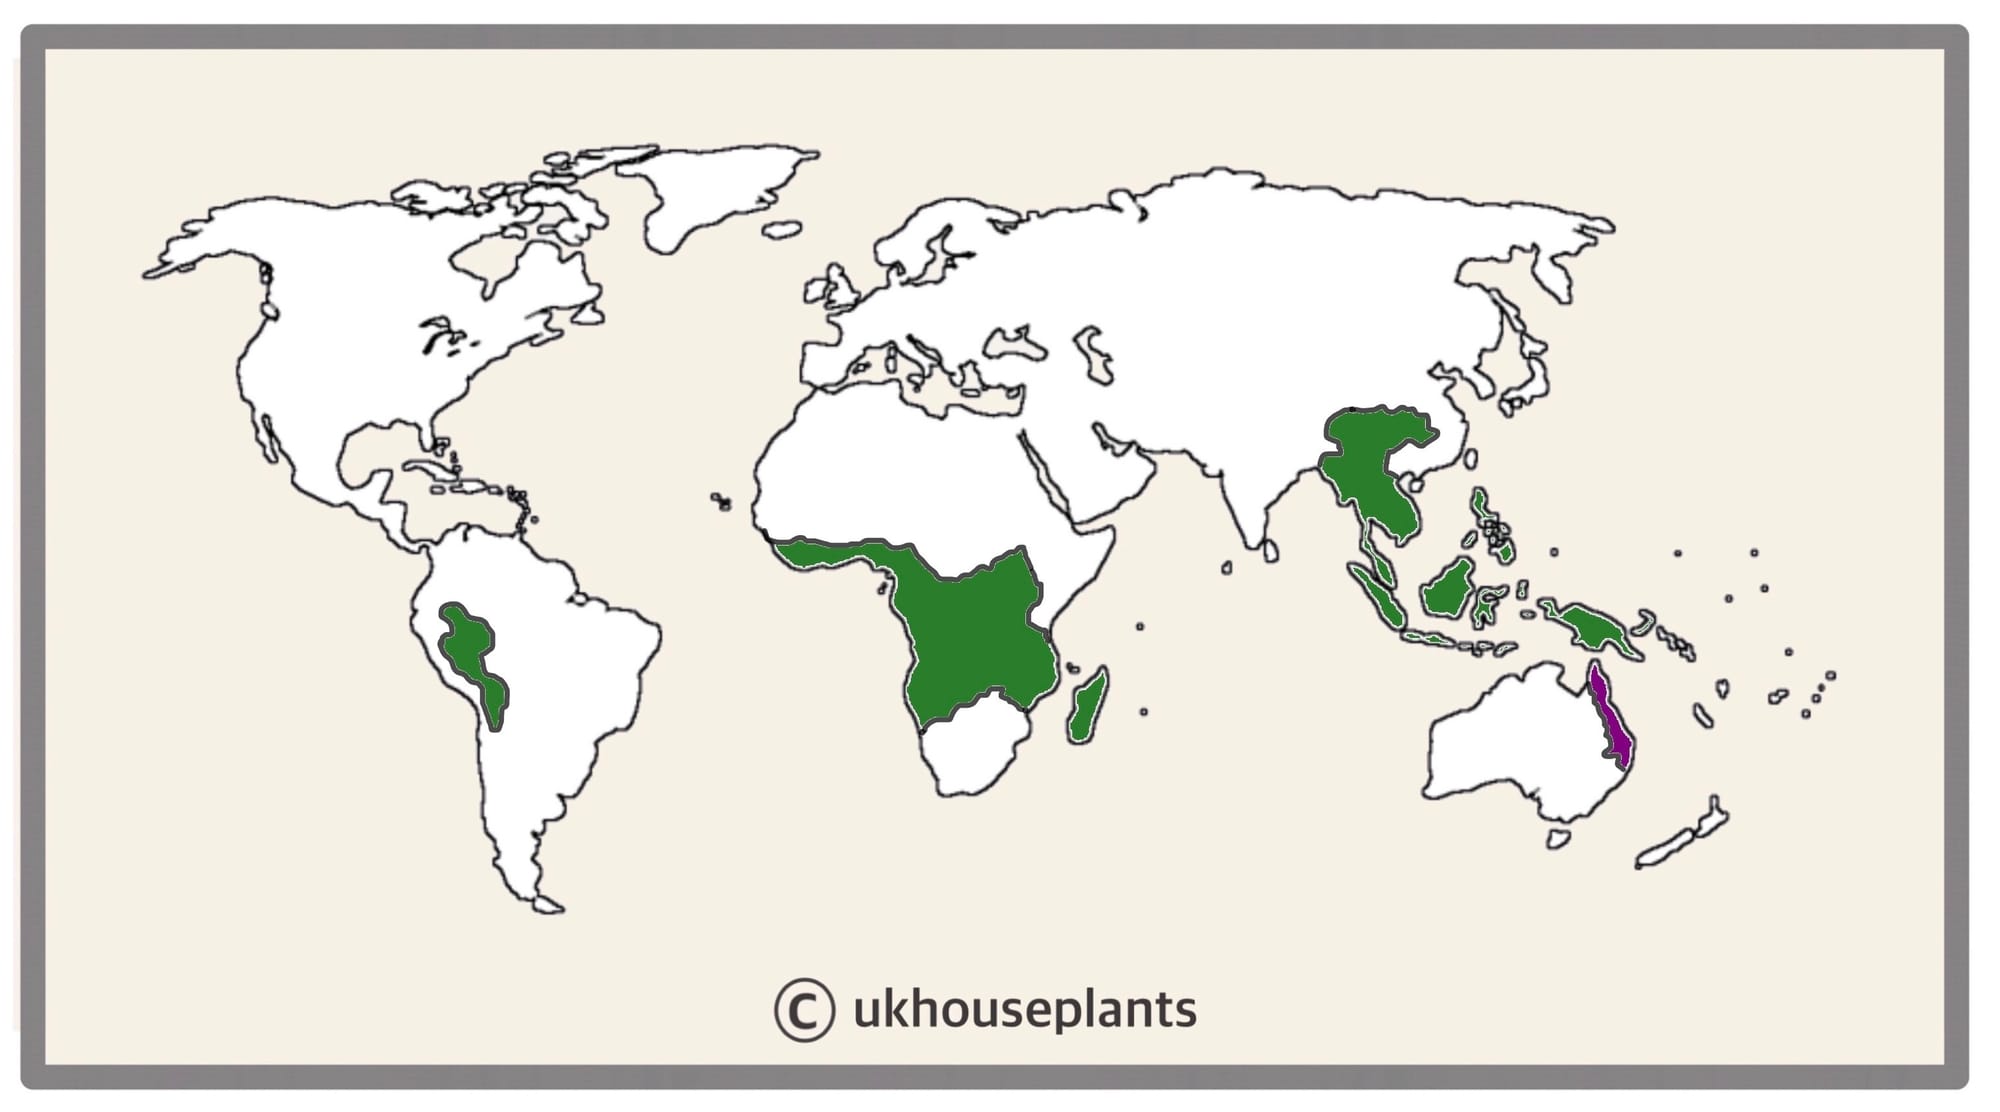 The Distribution of Platycerium in Green & P. bifurcatum and P. superbum in Purple.
Temperature
-1° - 26°C (30° - 80°F)
H3 (Hardiness Zone 9) - Tolerate to temperatures below freezing. Although it can survive frosts and thin snow, refrain from bringing it indoors overnight if the room temperature is above 5℃ (40℉), as a sudden change in temperature may cause environmental shock with weakened Spring growth and a lack of flowers over the season's course. Instead, either leave it outdoors or in an unheated conservatory, brightly lit garage or a greenhouse until the risk of frost has elapsed.
Spread
Over 1m in both height and in width, with the ultimate height taking between 4 - 8 years to achieve.
Pruning & Maintenance
Remove yellow or dying leaves, and plant debris to encourage better-growing conditions. While pruning, always use clean scissors or shears to reduce the chance of bacterial and fungal diseases. Never cut through yellowed tissue as this may cause further damage in the likes of diseases or bacterial infections. Remember to make clean incisions as too-damaged wounds may shock the plant, causing weakened growth and a decline in health.
Propagation
Via Spores & Basal Offsets.
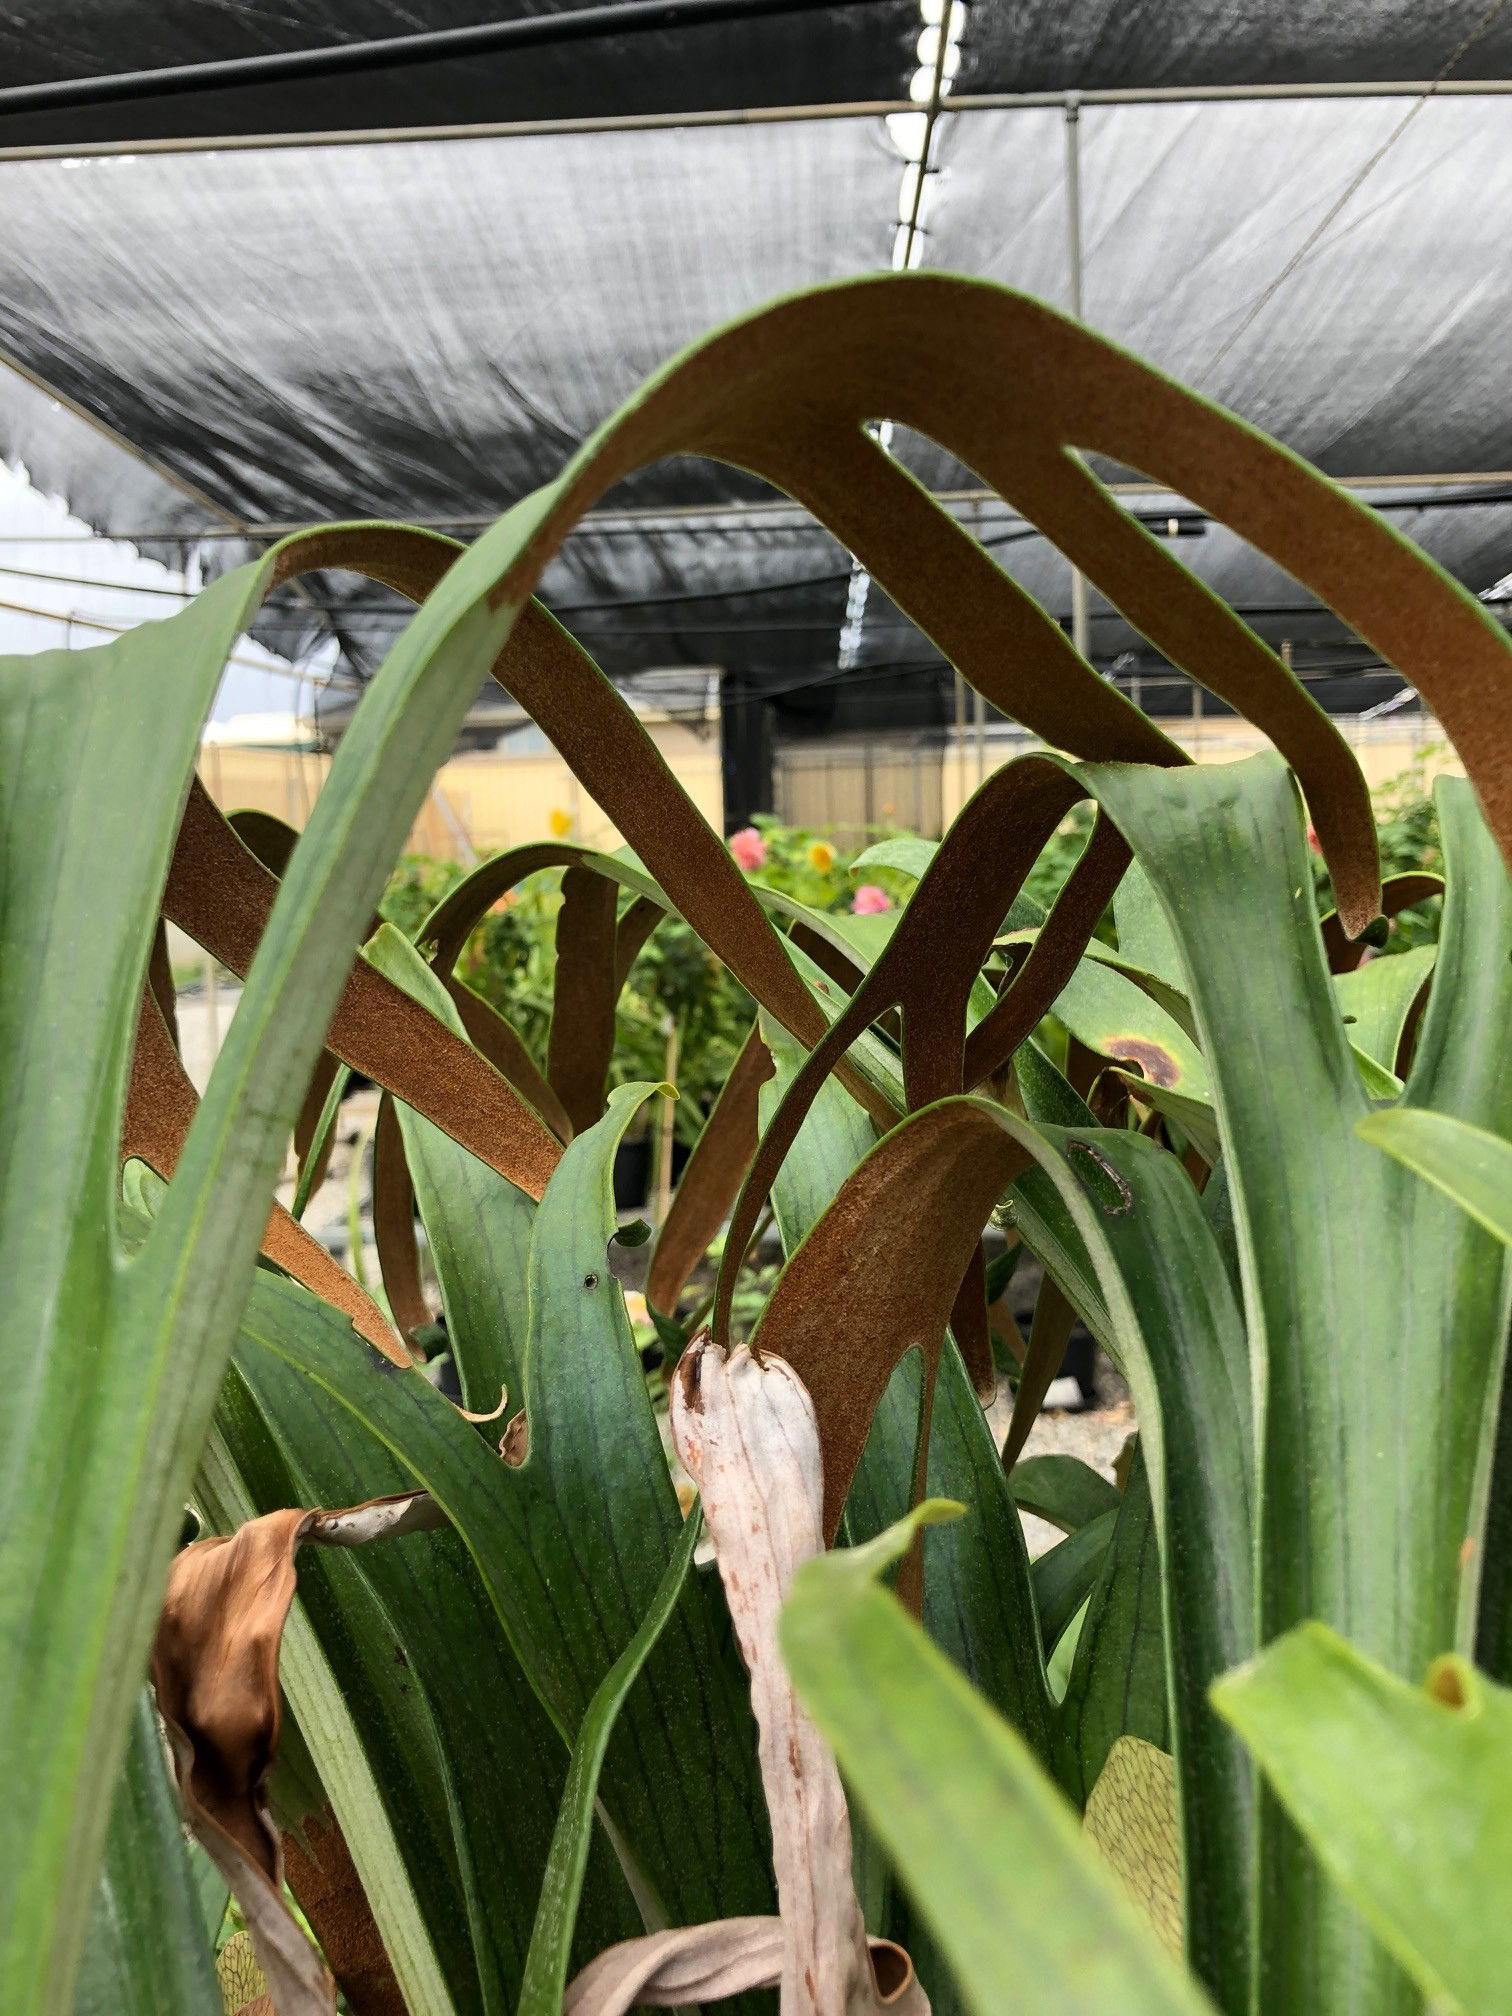 Spores are the primitive version of seeds that can be dated back to the Triassic Period, 200 million years ago.
Spores (Moderate) - You may have noticed little brown spots under the leaves - those are reproductive spores that can be propagated in the same way as seeds, once matured. These zygotes will develop on the under-leaves of each frond; you'll know when they're ready to be propagated, as they'll brown over and begin to crisp.
- Choose an appropriate potting-mix; we'd recommend a 'Houseplant' labelled compost as it boasts a good balance of drainage and water retention. Place the soil into a plastic pot (any size is fine) that has adequate drainage holes.
- Separate the spores from the under-leaves using your hands. If the spores are brown and crispy, but can't be removed, cut the entire frond off. Make sure that the diameter of the pot is wider than the frond's span; however, you can cut the frond (sideways) to fit the desired container better.
- Place the spores or fronds ON TOP of the compost, making sure that they sit flat against the soil-line.
- If you've managed to separate the spores, maintain moist soil by misting the top layer every few days. Do not submerge into the soil as this will reduce the rates of success. For those who still have entire fronds, place the foliage on top of dry compost. The dehydration will allow the spores to detach from the leaf, settling on the soil below.
- Place the potted spores/fronds into a transparent bag and situate it into a bright, indirect location. Provide temperatures above 18°F (64°F).
- Keep the spores moist, misting the top layer of the soil every few days. The fronds, however, must stay dry until you start to notice missing spores from the under-leaves. Once the majority have detached, discard the frond and begin misting the soil to aid hydration.
- As long as you provide high humidity (aided by the transparent bag locking in moist air) and good soil moisture, germination should begin. This process can take up to six months, but don't discard until it hits fifteen months of nothingness.
Once the spores have developed their first frond, place them into their own pot to grow. Safely remove the transparent bag and follow the care requirements listed at the top of the article. Once the basal frond surpasses 5cm in diameter, you can consider mounting it on a wooden board - see 'Mounting' for further information.
Basal Offset Division - Your plant will produce several basal offsets (pictured below) that can be separated once they produce their second basal frond (also known as non-fertile fronds). If possible, water the soil 24hrs before the main event to reduce the risk of transplant shock, when its dry root systems are over-fingered. Take the plant out of its pot and place your fingers close to the nodal junction - soil/sphagnum moss may have to be removed for better access. Use a clean knife and slide behind the 'basal frond', mentally noting the high risk of damage and fibrous root systems that lay between the two plantlets. Transplant in the appropriate sized pot with a fresh batch of 'Houseplant' soil, OR mount it onto a platform of wood. Scroll down to 'Repotting & Mounting' for more information.
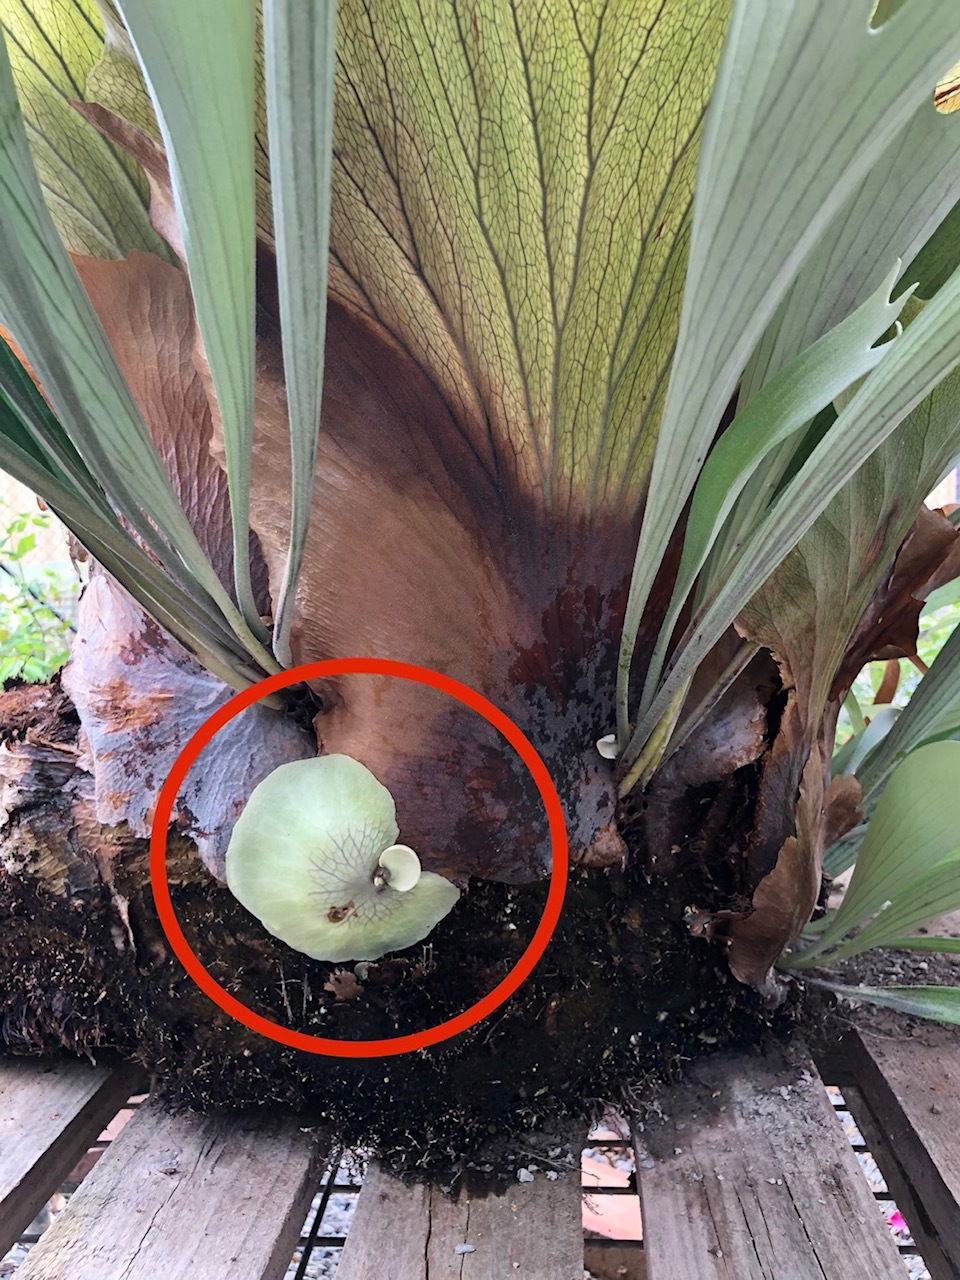 A developing offset that can be separated once it produces the second fertile frond. Circled is a basal / 'infertile' frond.
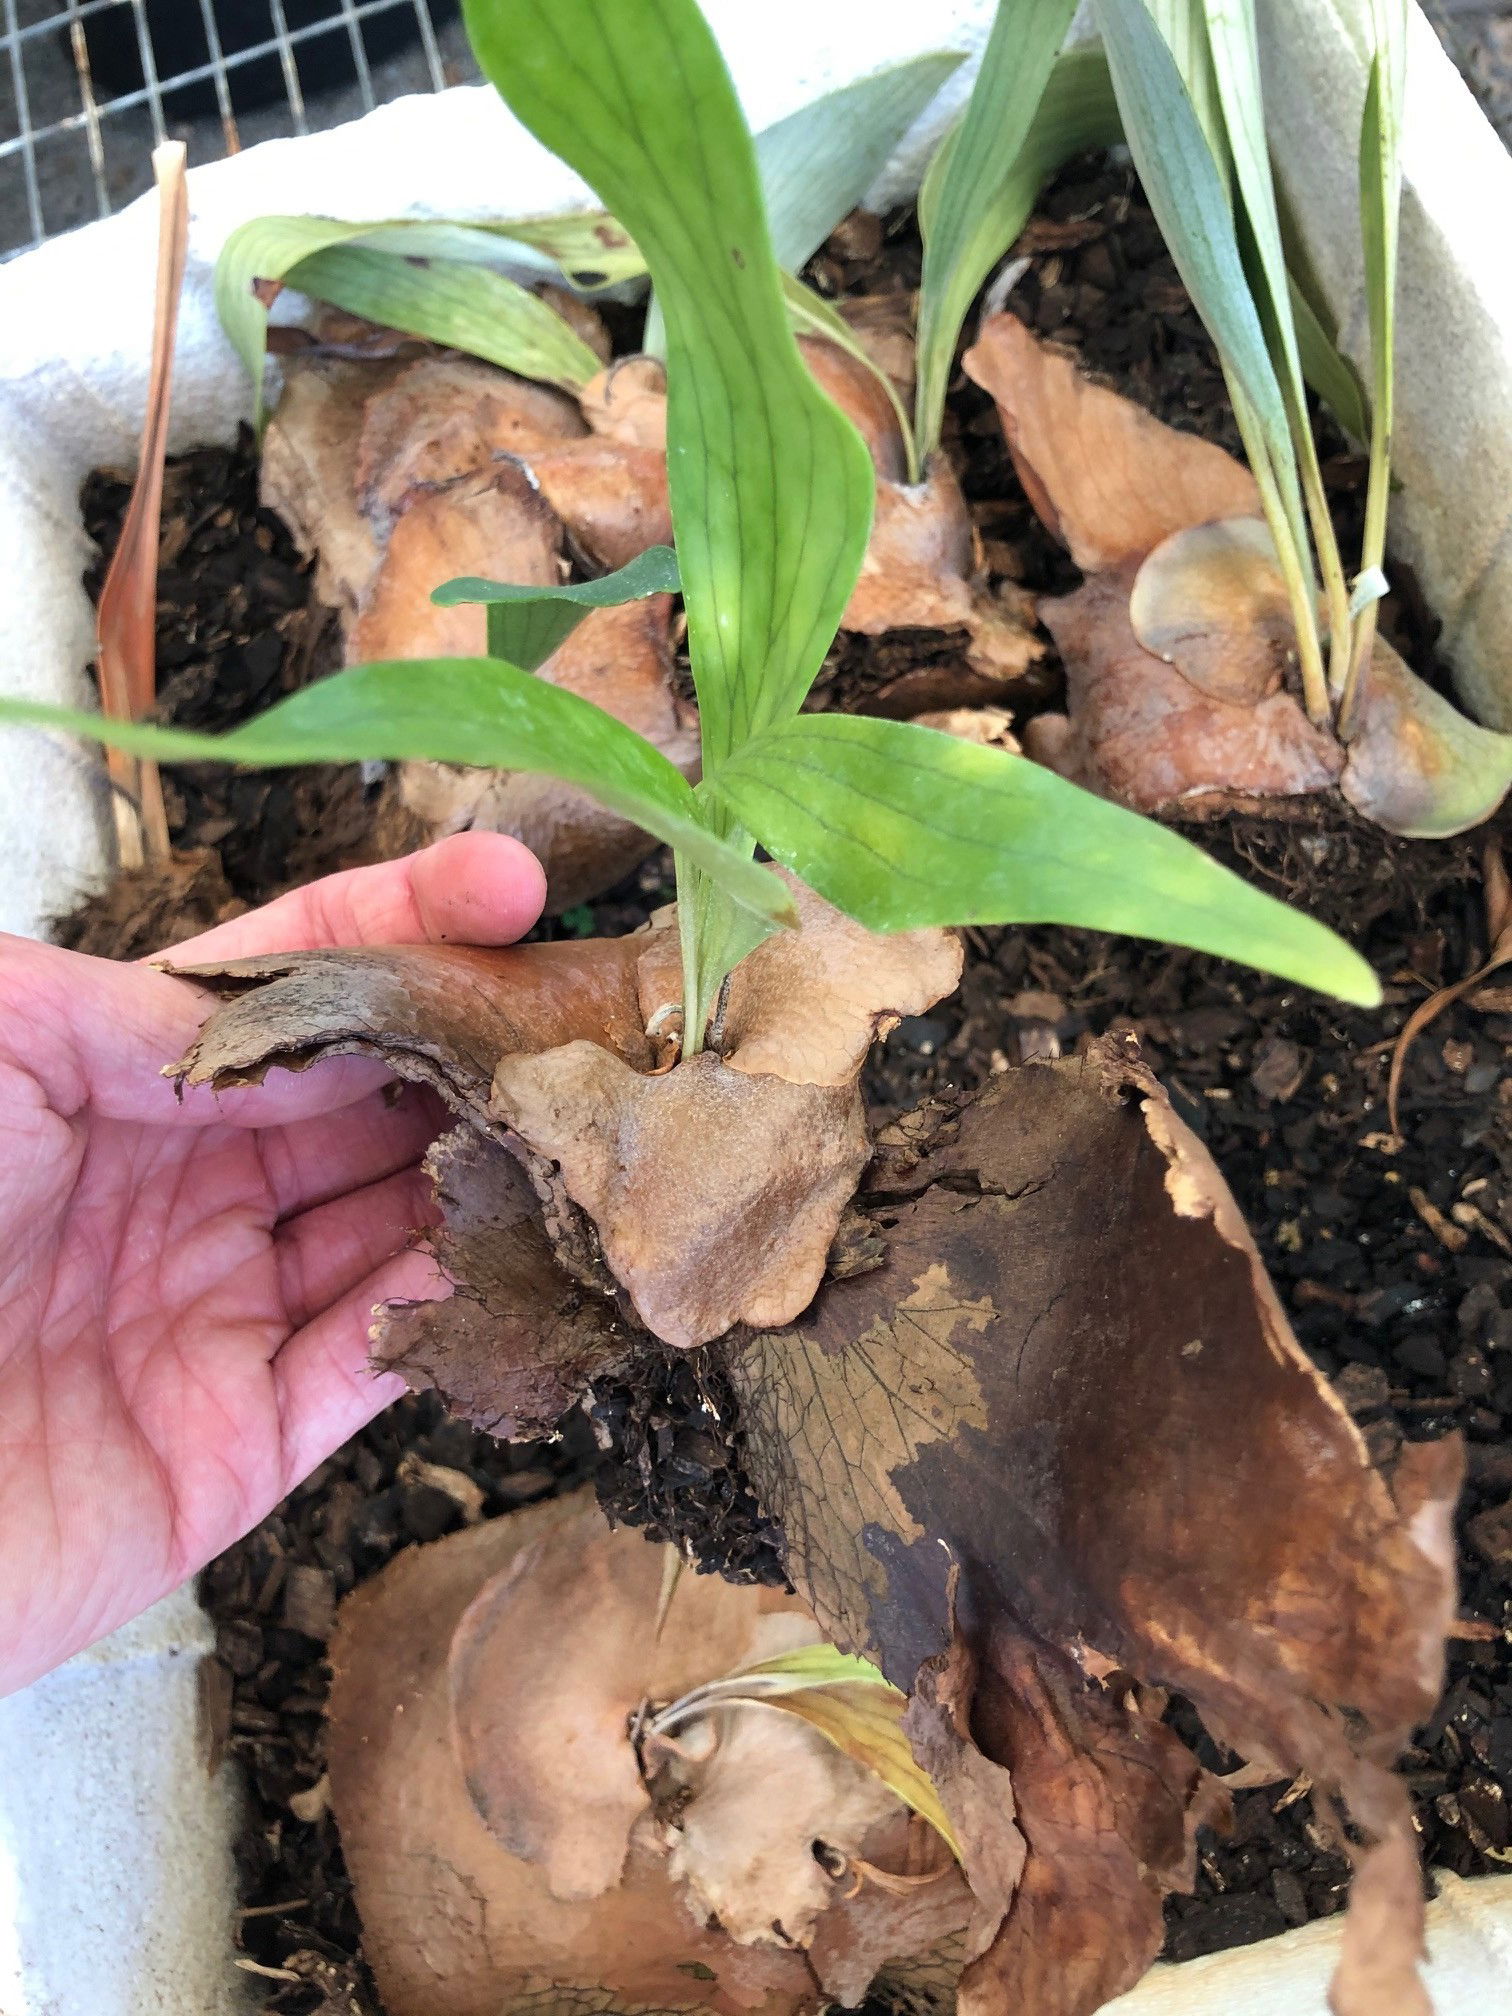 A two-year old specimen that's ready to be mounted onto some moss.
Flowers
Staghorn Ferns will not flower or produce seeds, and instead produce microscopic spores on the undersides of fronds.
Mounting (Repotting)
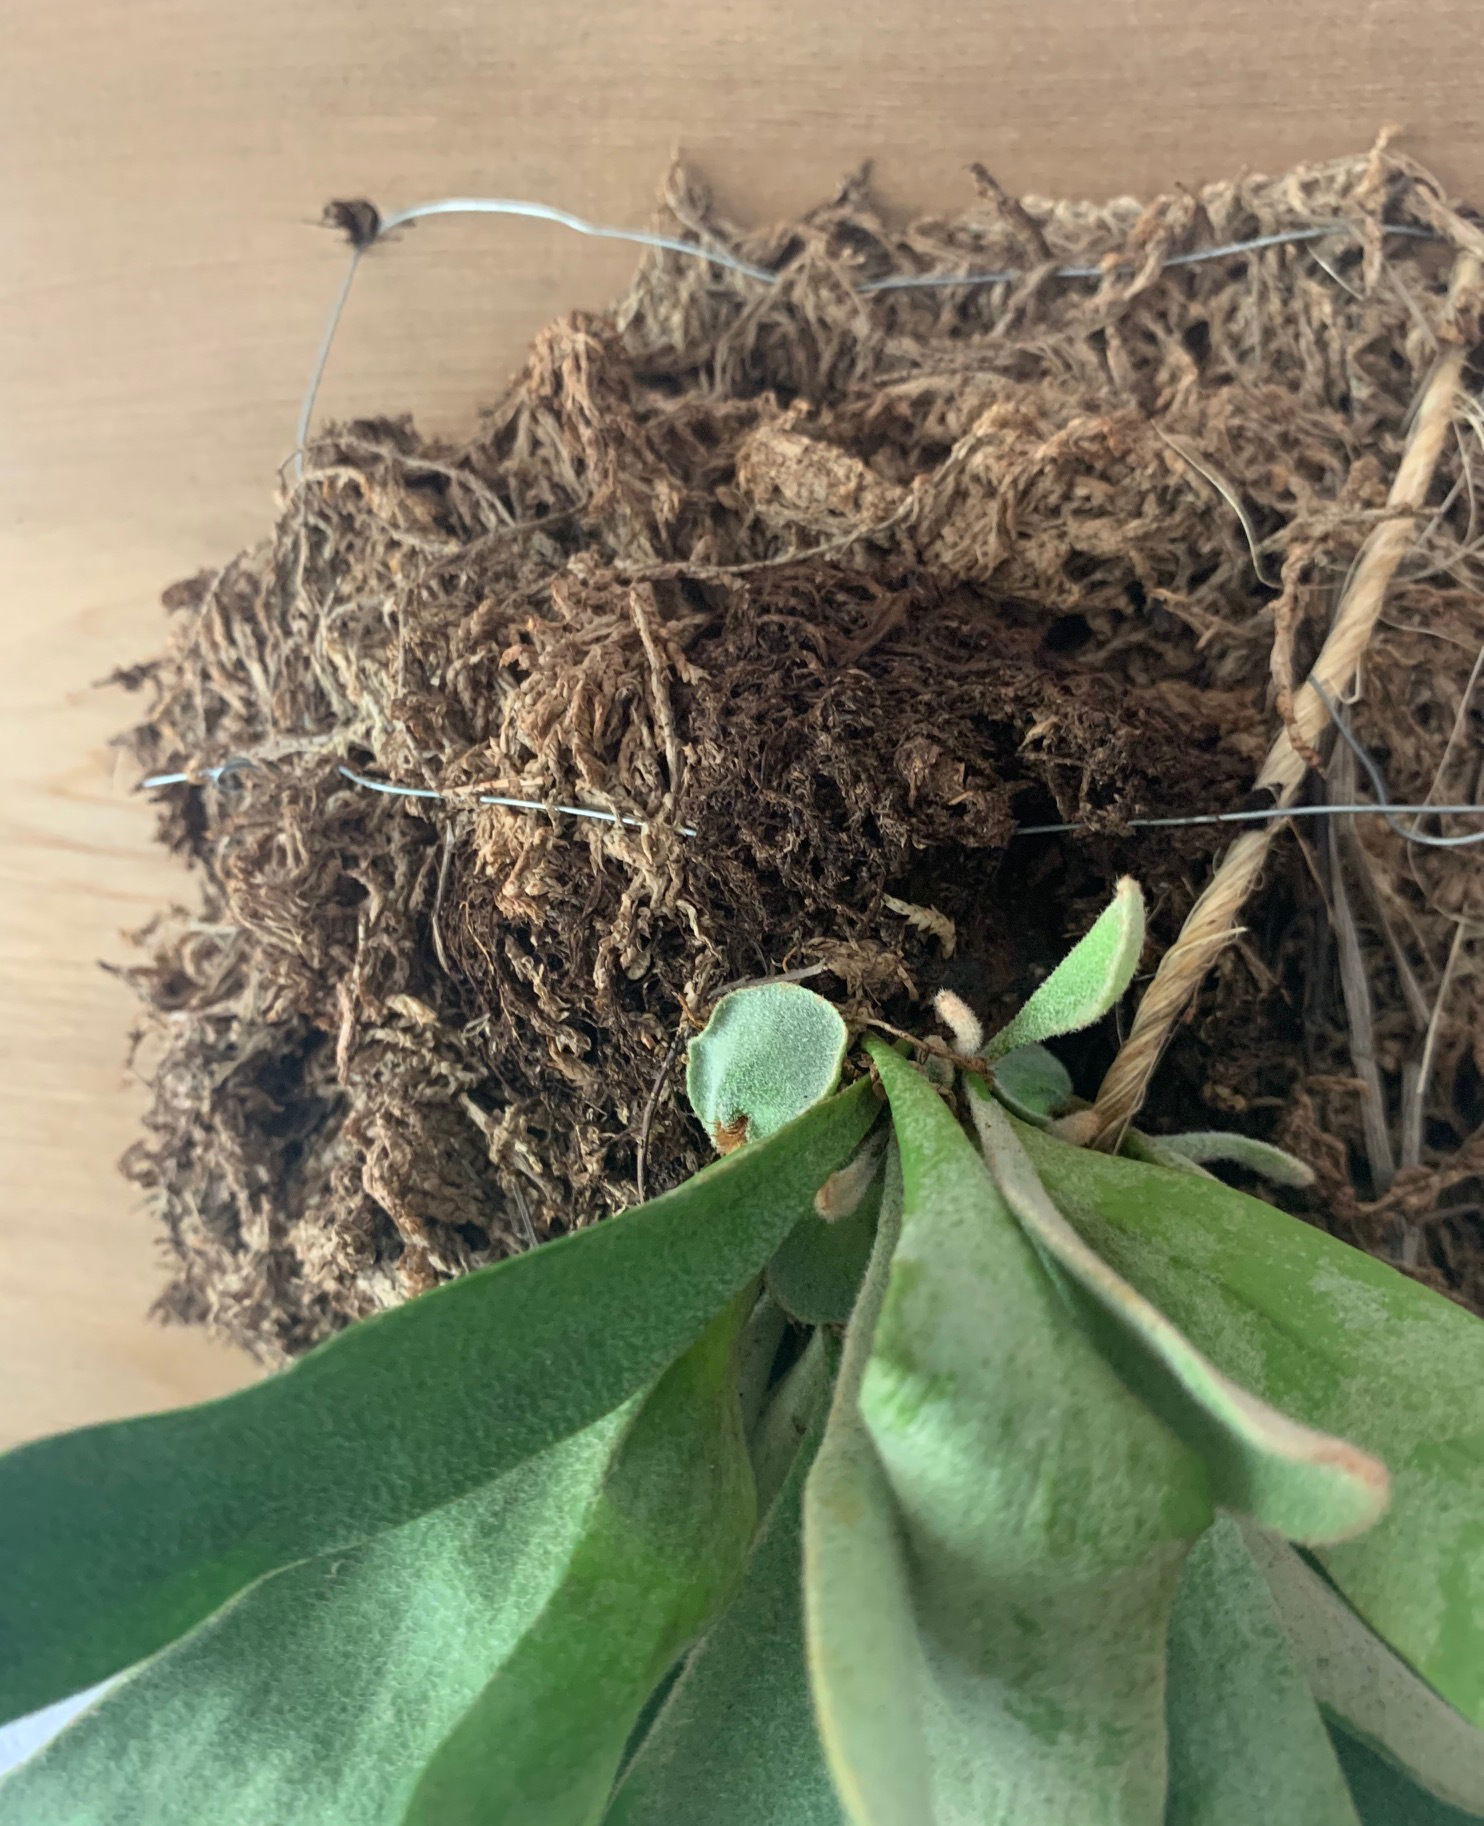 Laying the fern's base onto a bed of sphagnum moss will lock in the vital moisture, along with promoting better air circulation. Credit - Owen's Plant Obsession
Items Needed For Transplantation.
Mounting Board
Long Fibre Sphagnum Moss
Twine or Wire
Lay the mounting board on a flat surface and add a small mound of unmilled sphagnum moss to the board (for root development). Place the root ball onto the pile, filling the remaining gaps with further moss to remove any air pockets. Use malleable wire or twine to secure the fern onto the mounting board, making sure you don't damage the plant's body. The basal fronds will cover the wire in due course, so don't worry about the display's mechanics too much.
Some species of staghorn can grow on the rock outcrop. These species need less water than other species, due to their enriched ability to endure short-lived droughts.
Book a 1-to-1 video call with Joe Bagley if you'd like a personal guide to mounting your Staghorn Fern. This will include recommending the right branded-compost or equipment and wood-plank size, followed by a live video call whilst you transplant the specimen for step-by-step guidance and answer any further questions!
Pests & Diseases
Keep an eye out for mealybugs, aphids, spider mites, scale, thrips, blackfly, vine weevils & root mealybugs that'll locate themselves in the cubbyholes and undersides of the leaves, with the exception of the latter two in the soil. Common diseases associated with Staghorn Ferns are root rot, leaf-spot disease, botrytis, rust, powdery mildew & southern blight - click here to learn more about these issues.
Toxicity
Not known to be poisonous by consumption of pets and humans. If high quantities are eaten, it may result in vomiting, nausea and a loss of appetite.
Retail Locations
Online Stores.
Book a 1-to-1 Call with THE HOUSEPLANT DOCTOR™
If you need further advice with your houseplants, book an advice call with ukhouseplants' friendly and expert writer today! This can be done via a video or audio call on most apps, including Facebook, FaceTime & Skype. A ten-minute call costs £5.99 (US$7), or £15.99 for thirty minutes. You can ask multiple questions, including queries on plants, pests, terrariums, repotting advice and anything in between. Please consider supporting this service to keep ukhouseplants thriving!