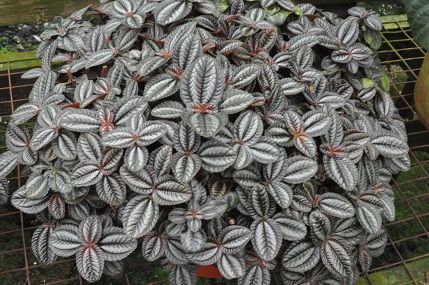
Pilea involucrata. Copyright: Pinterest.
Contents
- Top Tips
- Location, Water, Humidity & Fertilisation
- Common Issues
- Origins, Temperature, Propagation, Repotting & Toxicity.
Are you struggling to find the answer to your specific plant issue? Book a 1-to-1 video call with THE HOUSEPLANT DOCTOR™, the website's friendly author, to overcome and address your niggling problem! Available on iMessage, WhatsApp, Facebook Messenger & more.
Top Tips & Info
- Care Difficulty - Easy
- Friendship Plants will require a bright, indirect location with the avoidance of direct sunlight or excessively dark conditions. Optimising their location first will significantly ease the difficulty of its care requirements.
- Water once the top third of the soil dries out, reducing this further in the autumn and winter.
- Fertilise using a 'Houseplant' labelled feed every four waters in the spring and summer, reducing this to every six in the colder months.
- Regularly check for pests, most notably Mealybugs.
- Keep the ambient temperature above 12℃ (54℉) throughout the year, especially if placed outdoors in the summer.
- Repot every two years in the spring, using a 'Houseplant' labelled potting mix - this is the perfect time to take stem-tip cuttings to promote a bushier appearance.
Location & Light - 🔸🔸
Maintain a bright, indirect setting with a splash of morning sun over the autumn and winter months. When the height of summer returns, be sure to avoid all direct sunlight for the prevention of sun-scorch. The amount of light and current season of the year will directly govern the frequencies of waters per month, with specimens placed in darker areas must be kept on the drier side to life and brighter locations requiring better soil moisture to lubricate photosynthesis.
Water - 🔸🔸
Irrigate once the top third of the soil dries out, reducing this slightly over the autumn and winter months. Due to their low growing nature, never allow the foliage to remain saturated as the older leaves (those closest to the soil) could yellow and rot away, slowly spreading to other parts of the plant. Under-watering symptoms include grey leaves or stunted growth; these issues are commonly down to much sunlight or heat, as well as forgetfulness. Over-watering, on the other hand, include rapidly yellowing leaves, stunted growth, wilting and root rot. These symptoms could be due to a location that is too dark, water logging, too little heat and an excess of moisture on the foliage. If you feel that root rot is to blame, click this link for more information.
Humidity - 🔸🔸🔸
They'll need continual misting to prevent browning leaf tips, especially during the colder months while the heaters are operating. Inconsistent levels of surrounding air moisture will also cause stress, resulting in leaf loss and stunted growth; if you're a forgetful gardener, introduce a humidity tray instead to provide a steady and reliable amount of surrounding moisture, along with the occasional mist.
Fertilisation - 🔸🔸
Feed every four waters during the growing period and every six in the autumn and winter, using a 'Houseplant' labelled fertiliser. Never apply a 'ready to use’ product into the soil without a pre-water first, as it may burn the roots and lead to yellowed leaves.
Common Issues with Friendship Plants
Root rot is a common issue with specimens sat in too moist or waterlogged soil for long periods. Symptoms include rapidly yellowing leaves, stunted growth and a rotten brown base. Take the plant out of the pot and inspect health below the soil line. If the roots sport a yellow tinge, you're good to go, but if they're brown and mushy, action must be taken immediately. More information about addressing root rot can be found on this link.
Too low humidity can cause browning leaf tips with yellow halos. Although this won't kill your specimen, you may want to increase the local moisture to prevent the new growth from adopting these symptoms. Mist or rinse the foliage from time to time and create a humidity tray whilst the heaters are active to create a stable environment for your specimen.
When a Pilea is severely dehydrated, most of its leaves will crisp-up and fall off. Although it may spell the end of juvenile plantlets, there may still be light at the end of the tunnel for more established specimens. If its stem is still plump without any signs of retraction, prune-away the seriously affected areas and contain the plant (with its pot) in a transparent bag. Keep the soil continually moist, providing a good level of indirect light and temperatures above 15°C (59°F). Remove from the bag after two months of solid foliar growth.
Origins
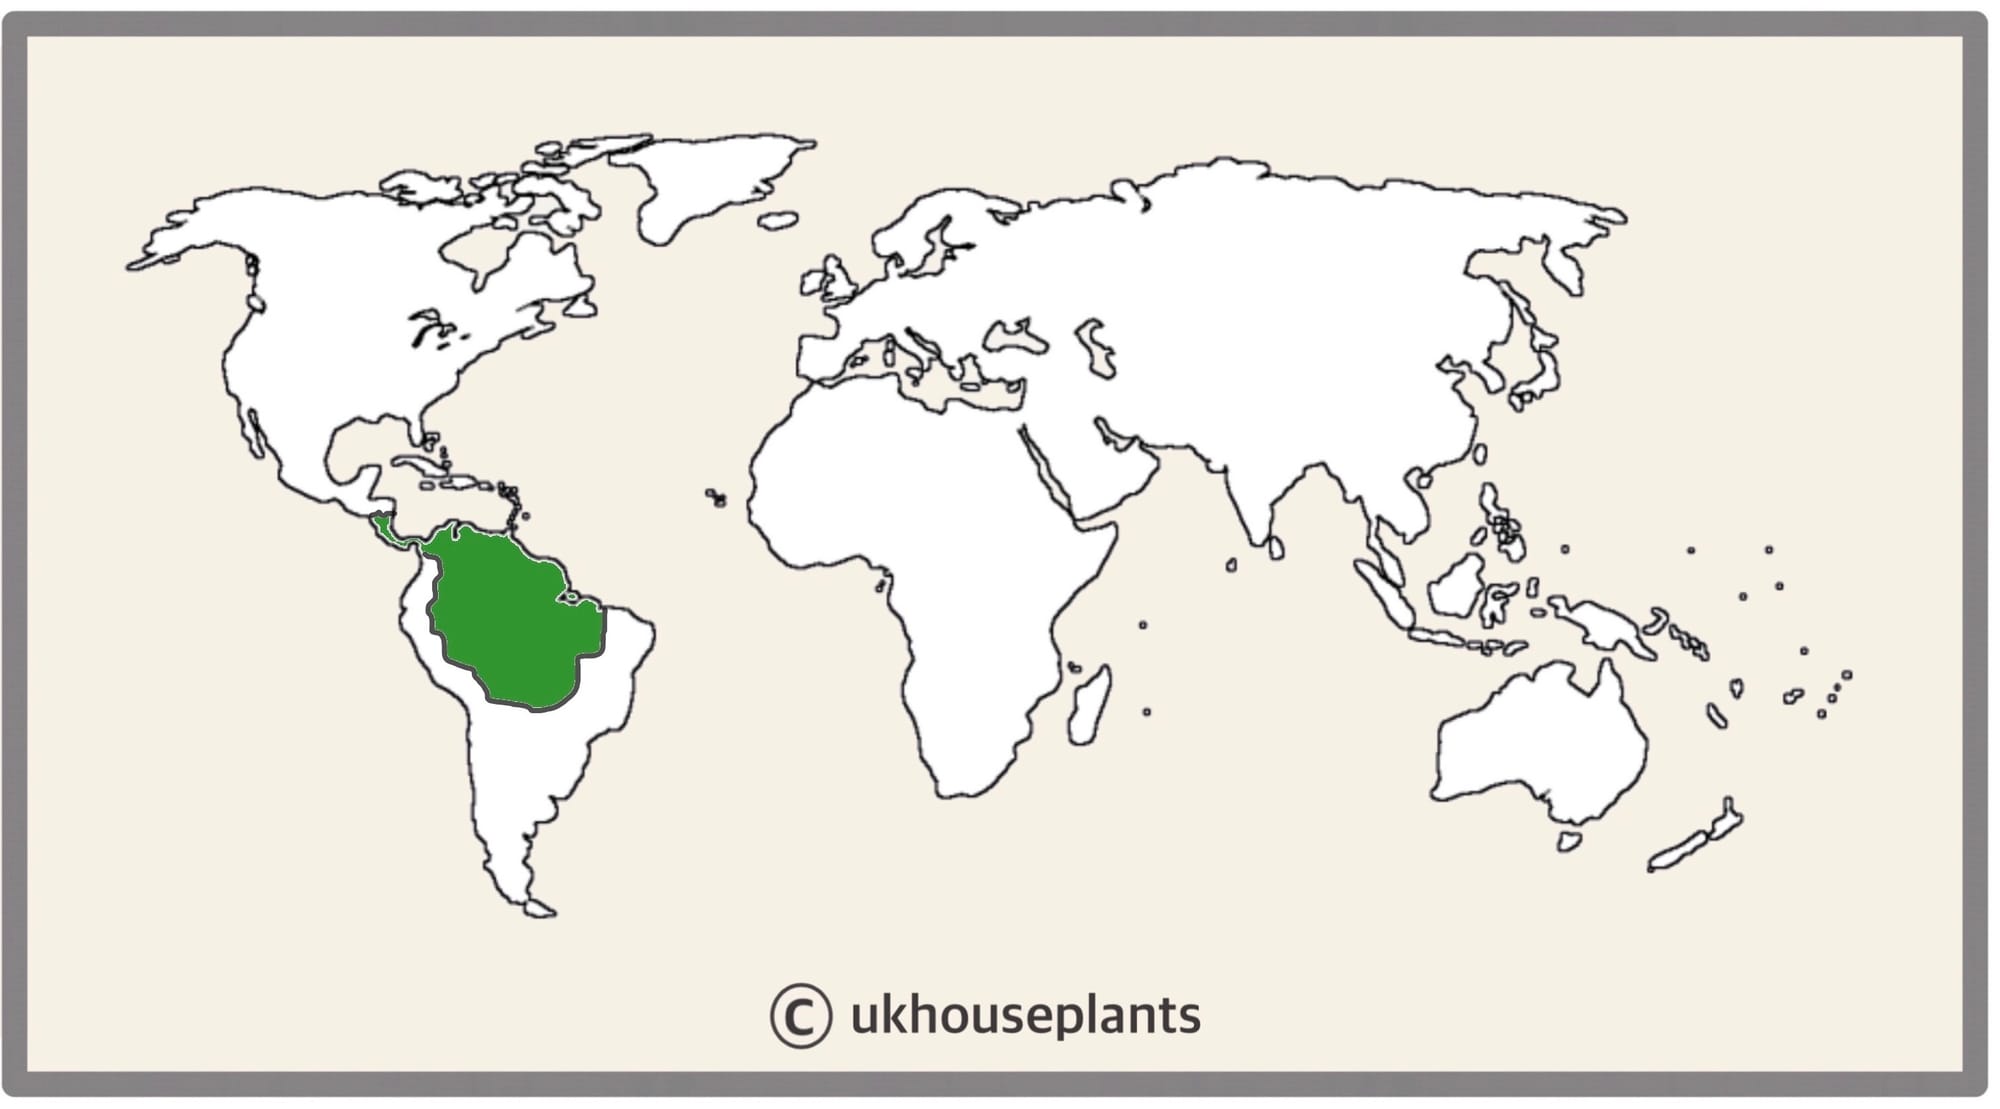
Pilea involucrata, or Friendship Plants, is commonly found in South America where it grows as ground cover in semi-shaded floors. The name, Pilea, derives from the Latin word pileus, meaning 'felt cap' due to the calyx covering the achene; involucrata also lends its name to Latin, referring to the 'curled' anthers of its flowers. The genus was first described back in the early 19th century by British botanist, John Sims, during a trip to South America.
 The Distribution of P. involucrata
Temperature
12° - 27°C (54° - 81°F)
H1b (Hardiness Zone 12) - Can be grown outdoors during the summer in a sheltered location with temperatures above 12℃ (54℉), but is fine to remain indoors, too. If you decide to bring this plant outdoors, don't allow it to endure more than an hour of direct sunlight a day as it may result in sun-scorch. Regularly keep an eye out for pests, especially when re-introducing it back indoors.
Spread
Up to 0.3m in both height and 0.5m in width. The ultimate height will take between 3 - 5 years to achieve.
Pruning & Maintenance
Remove yellow or dying leaves, and plant debris to encourage better-growing conditions. While pruning, always use clean scissors or shears to reduce the chance of bacterial and fungal diseases. Never cut through yellowed tissue as this may cause further damage in the likes of diseases or bacterial infections. Remember to make clean incisions as too-damaged wounds may shock the plant, causing weakened growth and a decline in health
Propagation
Via Seed, Division & Stem-Tip Cuttings.
Division (Easy) - Your plant will produce several basal offsets that can be separated once they have a sufficient root system. If possible, water the soil 24hrs before the main event to reduce the risk of transplant shock, when its dry root systems are over-fingered. Take the plant out of its pot and place your fingers close to the nodal junction - soil may have to be removed for better access. Push the chosen offset downwards until you hear a snap. Separate the foliage and its root system away from the mother plant, mentally noting the high risk of damage. Transplant in the appropriate sized pot with a fresh batch of houseplant soil. Maintain evenly moist soil and situate it in a bright, indirect location away from any direct sunlight. After four weeks, treat it like a normal specimen, following the care tips above!
Stem-Tip Cuttings (Moderate) can be taken at the start of Spring when specimens surpass 8cm in height. Either pinch or prune the top 3cm (1.1 inches) of growth with at least to nodes (leaves) - one for foliar growth and the other for root development. Gently remove the lower leaves and set the bottom half of the stem into a moist potting mix. Although we’d recommend using a houseplant-labelled soil, a general-purpose compost with added perlite and sand will work wonders, too. As long as there is a splash of perlite introduced into the mix, oxygen will flow liberally around the cutting’s base to reduce the risk of basal rot. Wrap the plant (& its pot) in a transparent bag to maintain high humidity, as an absence of roots will result in moisture loss within the stem. Provide a bright, indirect location with continual soil moisture to quicken the rate of root development, along with better overall health. Remove the bag after four weeks of substantial foliar growth and follow the care advice provided above.
Flowers
Small clusters of white flowers will appear midway down the stem and can last up to several days. This process usually gets underway in late spring, but some specimens can flower before, or after this time bracket. Although Pilea will bloom each year, the show is almost uninspiring and is often removed by horticulturalists so that the plant focuses its energy onto the foliage.
Repotting
Repot every two years in the spring using a houseplant-labelled compost and the next sized pot with adequate drainage. Hydrate the plant 24hrs before the tinkering with the roots to prevent the risk of transplant shock. For those that are situated in a darker location, add a thin layer of small grit in the pot's base to improve drainage and downplay over-watering. Click here for a detailed step-by-step guide on transplantation, or via this link to learn about repotting with root rot.
Pests & Diseases
Keep an eye out for aphids, spider mites, mealybugs & whitefly. Common diseases associated with Pilea are root rot, leaf-spot disease, powdery mildew and botrytis (grey mould) - click here for more information about how to identify and address these issues.
Toxicity
Not known to be poisonous when consumed by pets and humans. If large quantities are eaten, it may result in vomiting, nausea and a loss of appetite.
Retail Locations
Online Stores.
Book a 1-to-1 Call with THE HOUSEPLANT DOCTOR™
If you need further advice with your houseplants, book an advice call with ukhouseplants' friendly and expert writer today! This can be done via a video or audio call on most apps, including Facebook, FaceTime & Skype. A ten-minute call costs £5.99 (US$7), or £15.99 for thirty minutes. You can ask multiple questions, including queries on plants, pests, terrariums, repotting advice and anything in between. Please consider supporting this service to keep ukhouseplants thriving!