Contents
- Top Tips
- Location, Water, Humidity & Fertilisation
- Common Issues
- Dormancy Care for Caladiums
- Origins, Temperature, Propagation, Repotting & Toxicity.
Need the answer to a specific plant query? Book a 1-to-1 video call with THE HOUSEPLANT DOCTOR™, the website's friendly author, to overcome and address your niggling problem! Available on iMessage, WhatsApp, Facebook Messenger & more.
Top Tips & Info
- Care Difficulty - Easy
- Bright indirect light is best, avoiding prolonged exposure to the sun, especially in the spring and summer. A location that is too dark will cause the variegations (foliar patterns) to weaken, leaving you with just a green plant.
- Keep the soil evenly moist, allowing the top third to dry out in between waters.
- Provide a good level of humidity by creating a pebble tray throughout the year.
- Fertilise using a 'Houseplant' labelled feed every three waters in the spring and summer, reducing this to every fourth in the colder months.
- In spring, repot every three years with a 'Houseplant' labelled potting mix. Water the plant 24hrs beforehand, to reduce the risk of damaging the root hairs (Transplant Shock).
- Keep an eye out for Spider Mites & Mealybugs that'll inhabit the plant's cubbyholes and foliage.
- Caladiums will go through a state of dormancy from late autumn until early spring, where its growth will halve, along with a slight reduction of foliage. Keep the soil on the drier side to avert the risk of winter root rot until mid-spring, where irrigations and fertilisation can be increased back to normal. If all of the foliage dies back - don't panic. Keep reading to find out more!
- If you're ever scared of over-watering your Caladium (at any point of the year), have a go at growing it in Sphagnum Moss with a transparent Orchid pot. The plant will root in the moss, creating a symbiotic relationship between the two. Note: You can either plant bare tubers (its 'bulbs') in moss, or by transferring an already-soil grown specimen into moss to grow on.
Location & Light - 🔸🔸
Caladiums require overhead lighting to promote a full, non-leaning appearance. Areas in your home that are too far from the windows will result in lopsided growth and a loss of variegations or coloured patterns. THE HOUSEPLANT DOCTOR™ recommends to grow your Caladium in an area that offers bright, indirect light with the possibility of morning sunlight throughout the autumn and winter months. A north, north-west or north-east facing windowsill or under a growlight are the best places to grow this plant.
Water - 🔸🔸
Less is more with these specimens. Excessive or unnecessary irrigations will quickly anger the plant, resulting in root rot and lower yellowing leaves. Caladiums have a tuberous base, meaning that water and nutrients can be stored in the underground vessel for times of drought. Water the specimen once the top third of the soil dries out, reducing this further in the autumn and winter. Over-watering symptoms include yellowing older leaves, wilting or curled foliage, mouldy soil and a rotten base. These issues are commonly the product of too little light, pure incompetence or a lack of drainage. For more information on how to address root rot, be sure to click on this link. Alternatively, under-watering symptoms include wilting, little to no growth, greying leaves and browning leaf edges, which are commonly down to too much light/heat, or forgetfulness.
Humidity - 🔸🔸🔸
They'll thrive in bright, moist environments, so average room humidity will not be enough for Caladiums. Introduce a pebble tray to maintain a high level of moisture, along with downplaying the risk of browning leaf-tips. Hose or mist the foliage from time to time to hydrate the leaves and keep the dust levels down.
Fertilisation - 🔸🔸
Fertilise every three waters during the growing period before reducing this to every fourth in the autumn & winter. Although an 'All-Purpose' fertiliser will still do the job, we'd recommend using a specific 'Houseplant' labelled fertiliser as it'll support the vital thirteen nutrients that this species will need to grow.
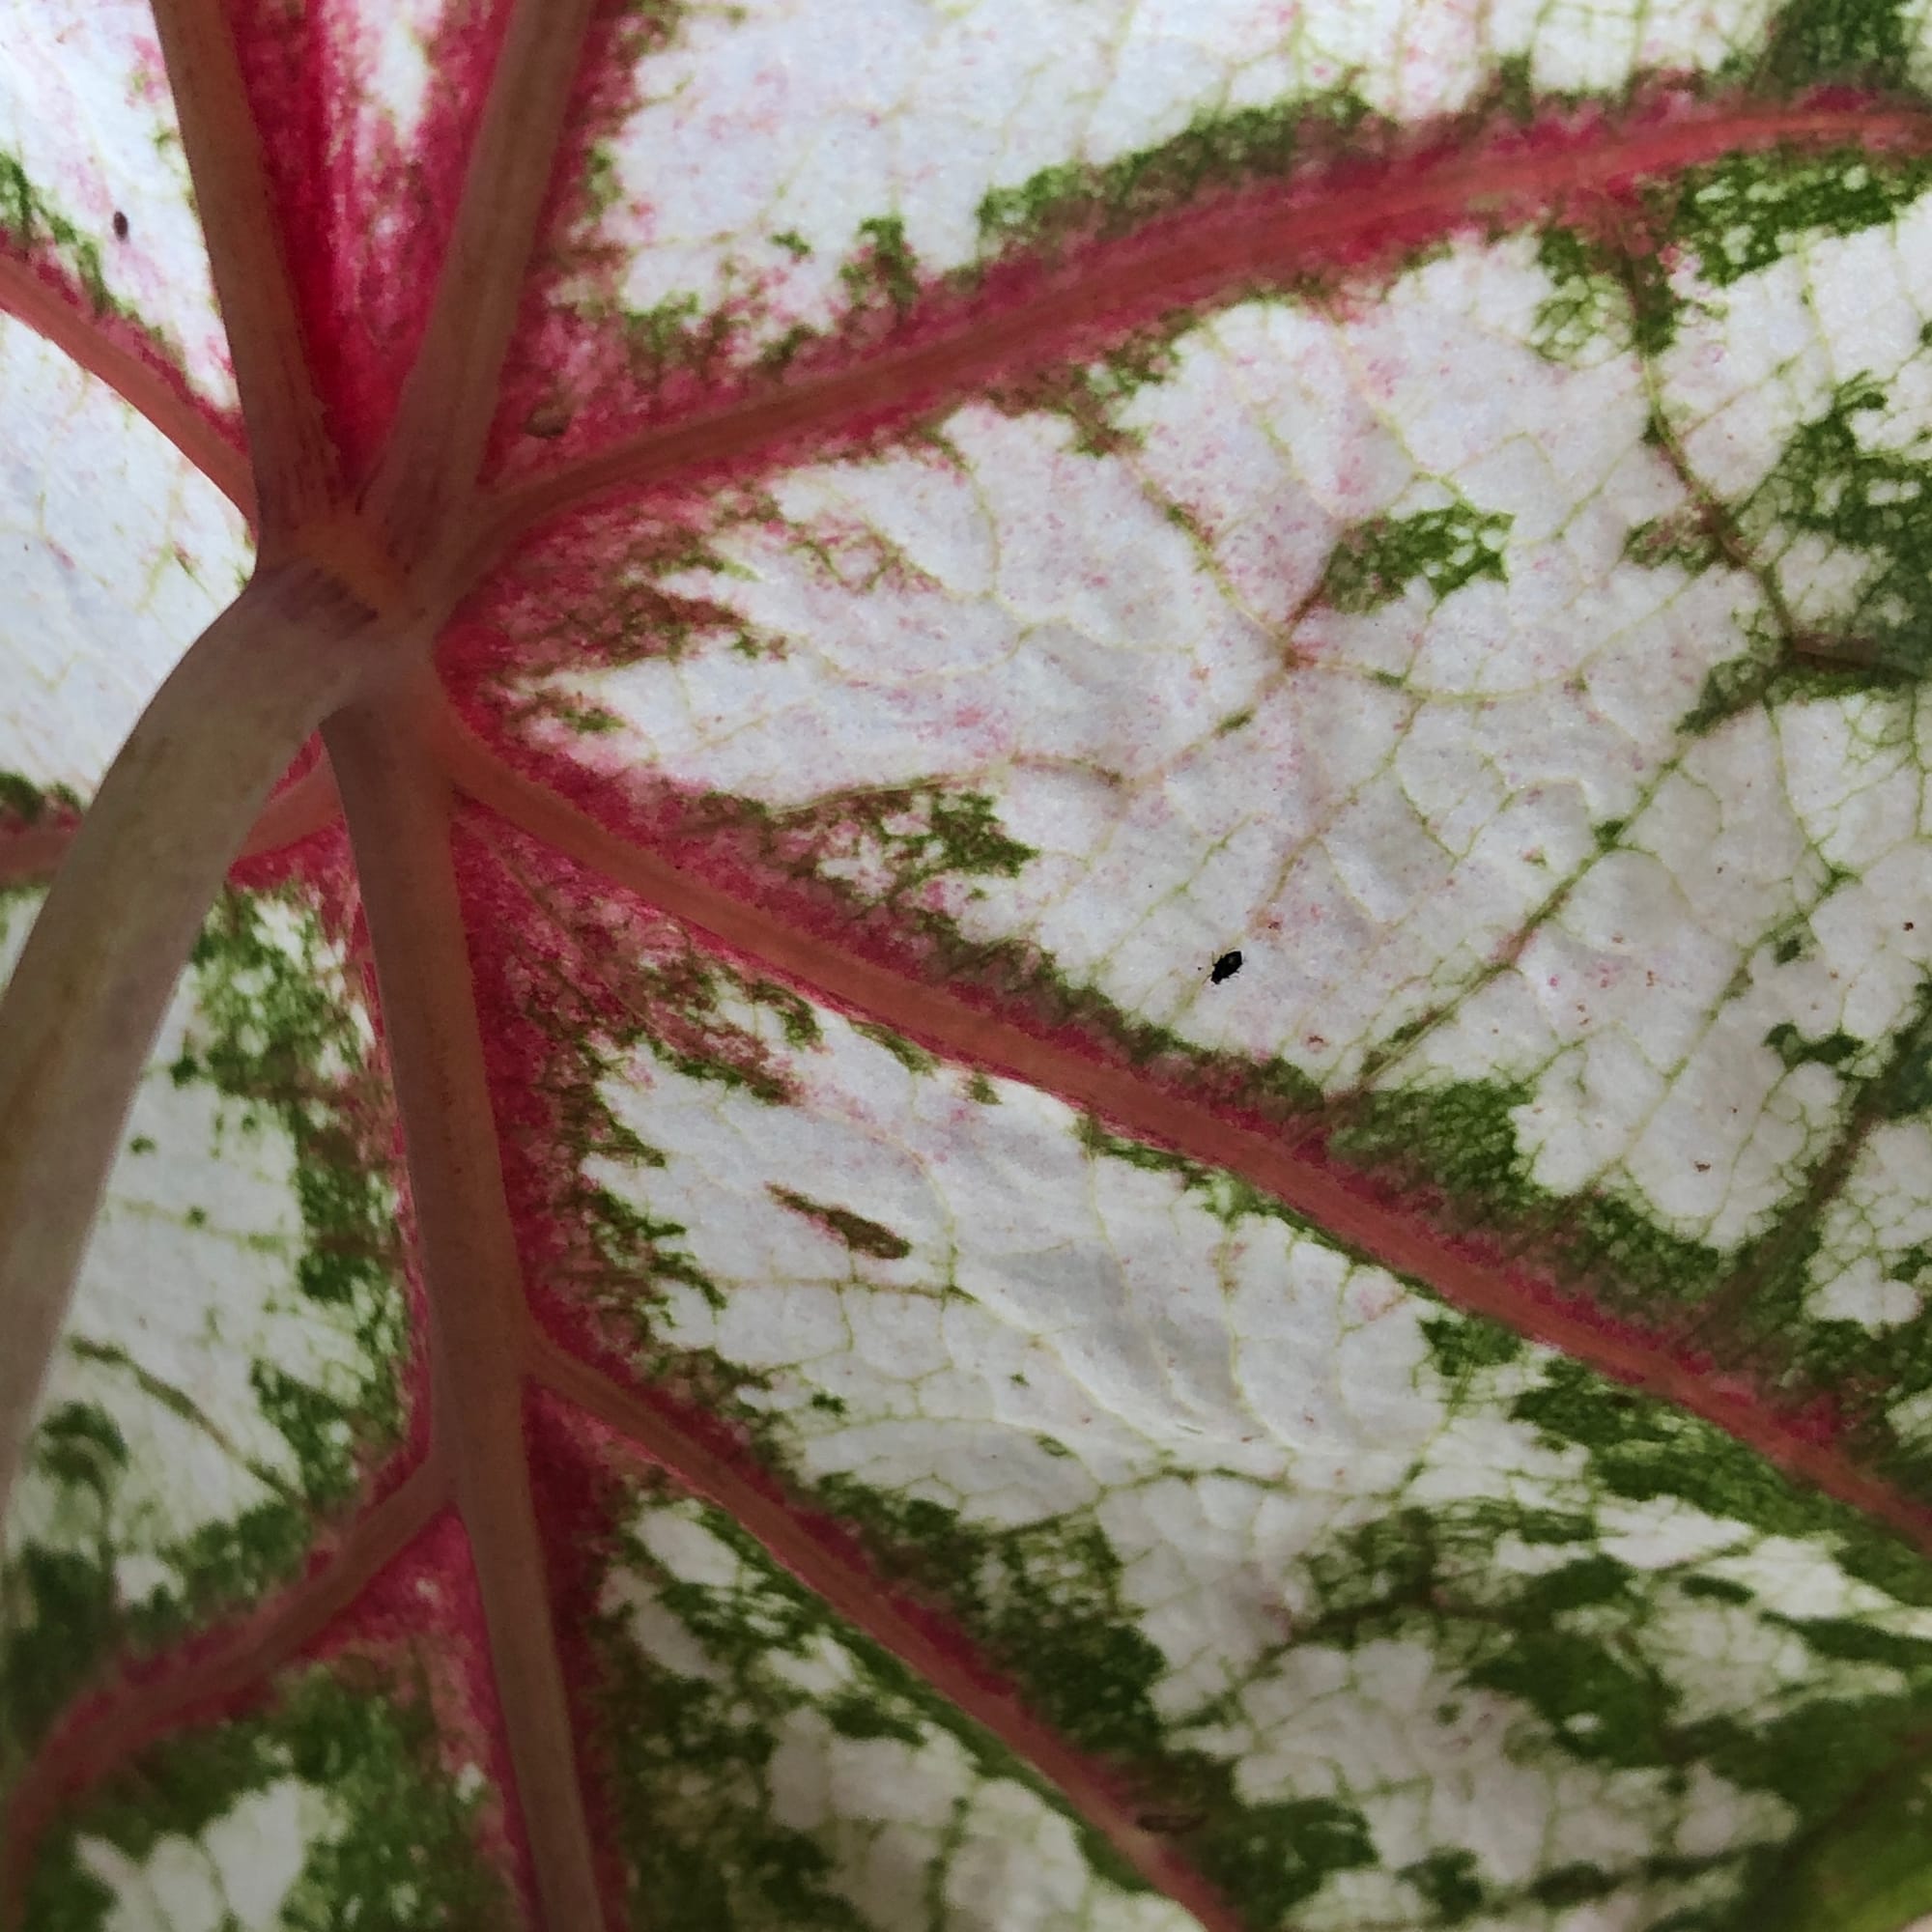 Although its variegations are stunning, your Caladium may have issues performing photosynthesis due limited chlorophyll in its leaves. We recommend growing yours in sunless window or under a grow light for optimum health. Remember: light energy is converted into plant energy that can be invested in new roots, leaves and potential flowers.
Common Issues with Caladiums
A reduction of leaves over the autumn and winter is entirely normal when the plant is serving its dormancy. Many of the older leaves will begin to yellow and wilt, thus leaving you with a few juvenile green leaves. Reduce the frequency of waters and fertilisation to counteract the heightened chance of root rot (slowed growth & darker days will result in less water-uptake in the plant), until the following spring. If, however, all of the leaves die back, exposing just its tuber, maintain a bright and cool environment around 15ºC (59ºF), along with infrequent waters. Allow almost all of the soil to dry out in between hydration and increase irrigations once the new juvenile growth appears in the spring. If you're still unsure of what to do, don't hesitate to book a 1-to-1 call with THE HOUSEPLANT DOCTOR™ to get his expert advice on this issue!
Excessive yellowing older leaves are a clear sign of over-watering, usually caused by too little light. Although Caladiums can do well in darker locations, the frequency of irrigations must be reduced to counteract the chance of root rot. Most don't realise that a plant's root system needs access to oxygen too; when soil is watered, the air will travel upwards and out of the potting mix. A lack of accessible oxygen for the roots will cause them to subsequently breakdown over the oncoming days. Click on this link to learn more about root rot and how to address it.
A wilting Caladium could be the product of a few different issues. Firstly, irregular watering habits may cause the specimen to partially enter a dormancy period, whereby energy will be limited to the leaves and stems. If you've exposed it to droughts or have forgotten it recently, try increasing the physical volume of water so that all of its soil becomes moist from the watering can. Only rehydrate the soil once the top third dries out in between waters. On the other hand, some Caladiums may begin to wilt if their soil has been kept considerably moist for long periods of time. If this has occurred with yours, be sure to repot the specimen in some fresh potting mix to wrap its roots around a more air circulating environment, as well as for better retention of moisture/nutrients. Stake the stems against a stick or trellis to improve the overall appearance.
Brown crispy new-growth that's become deformed is the product of over-exposure to the sun and dehydration. As mentioned previously, Caladiums will grow best in bright, indirect light with regular waters. Remove the affected areas and improve the growing conditions to counteract this issue occurring again. In some cases, Spider Mites could be the culprit for the abnormality, with small, near-transparent critters slowly extracting the chlorophyll out of the leaves. Have a check under the rest of the foliage, most notably along the midrib, for small webs and gritty yellow bumps. Click here to read our article about the eradicating Spider Mites, along with some extra tips that you may not find elsewhere!
A loss of variegations is caused by too little light. Although Caladiums is an excellent choice for shady locations, it'll come at the cost of its variegations. Move the plant into a brighter area with minimal direct sunlight to allow the variegations to appear on the new growth. If you aren't entirely displeased about the loss, simply skip this step. Alternatively, extreme variegations that hinder the plant from developing chlorophyll (green pigmentation) is typically caused by too much sunlight.
Mould developing on the soil means two things - too little light and over-watering. Despite the harmlessness of the mould, it'll prove unsightly to most gardeners and is therefore removed once known. To remove, replace the top two inches of the soil for a fresh batch of 'Houseplant' compost. Either increase the amount of light received (no direct sunlight for the first few weeks to prevent environmental shock) or decrease the frequency of waters slightly. If the mould is accompanied by yellowing lower leaves, you may also have a case of root rot.
Too much sunlight will lead to sun scorch, with typical signs including browning or crispy leaves, dry leaf-edges, sunken leaves or stunted growth. Although too little light will cause over-watering issues, excess sunlight will be a detriment to the plant as well. If yours has fallen short of this, reduce the amount of the sun considerably and always be mindful of environmental shock (when two locations offer too different growing conditions). Remove some of the affected leaves and increase waters slightly.
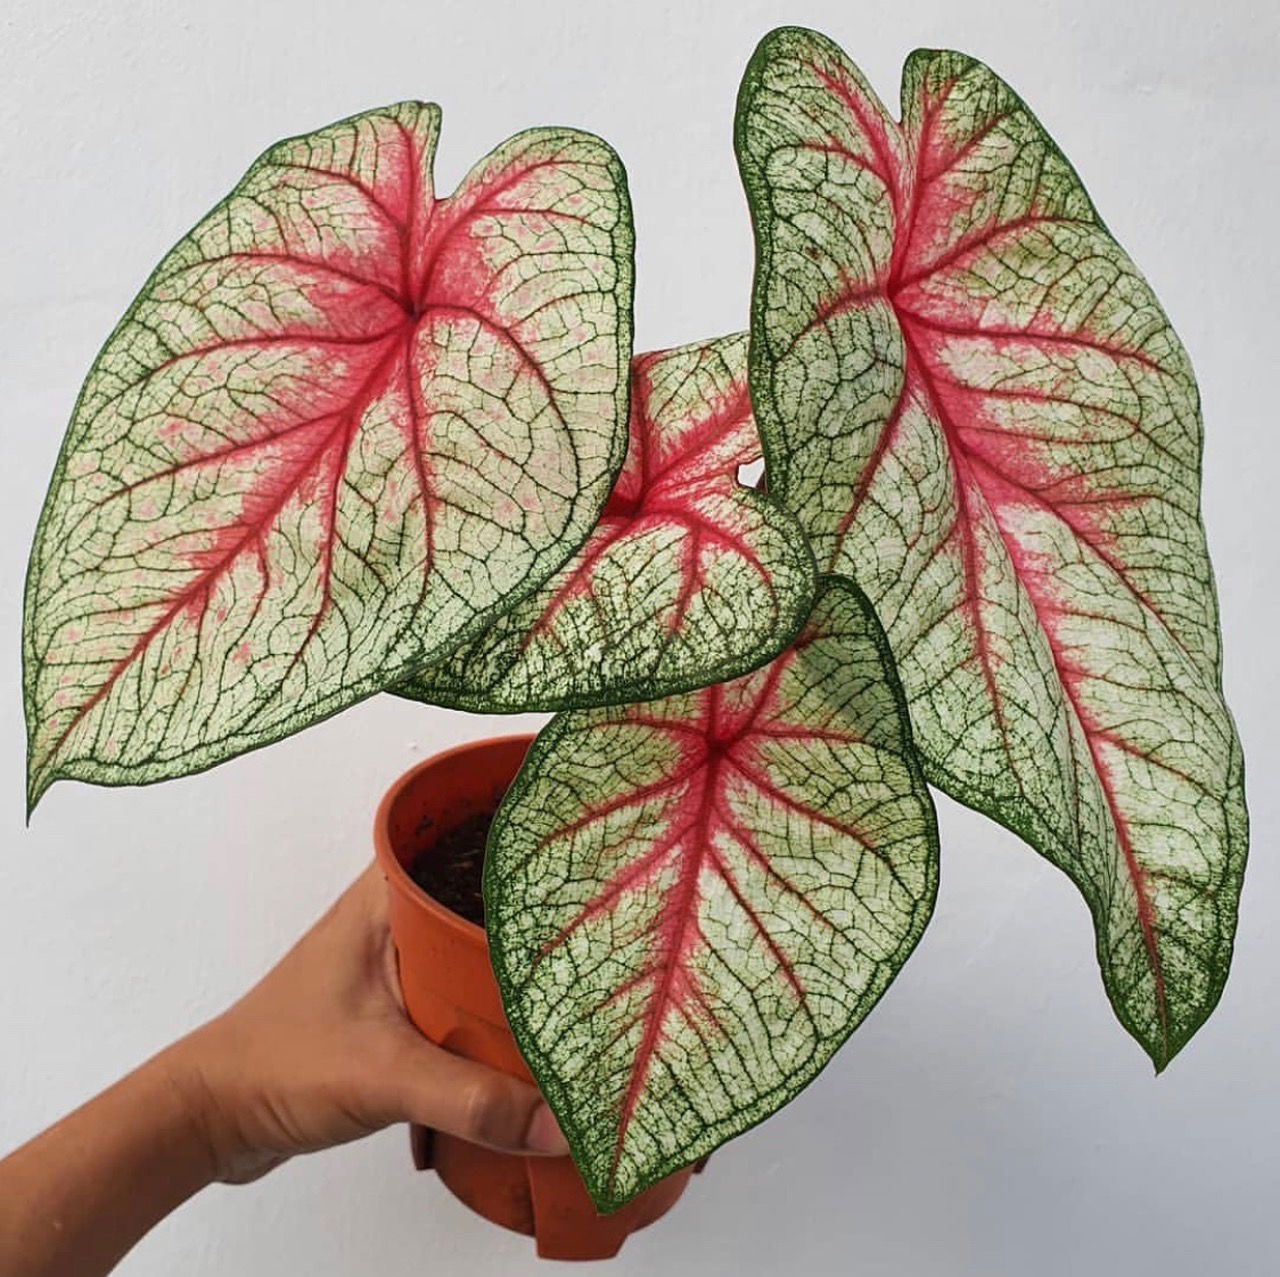 Caladium 'White Queen'. Copyright: Plantjamin
Dormancy Care for Caladiums
Step 1. At any point of the year, your Caladium may begin to wilt, curl, or suddenly begin to brown over. This is a normal phenomenon and is purely down to the fact that a Caladium is a 'perennial bulb'. Once the plant is beginning to look past its best, remove it from the pot and remove the soil from the roots. Then, prune off the roots to leave you with just its bulb (which will look like a hairy coconuts but slightly squishy). THE HOUSEPLANT DOCTOR™ recommends to keep this loose bulb on old newspaper or a breathable material in a cool, dark location. Areas like a garage, drawers or cabinets are good! Note: Check the health of the bulb by pinching it; a hardened bulb is healthy, with a squishy one meaning it's rotting and must be discarded.
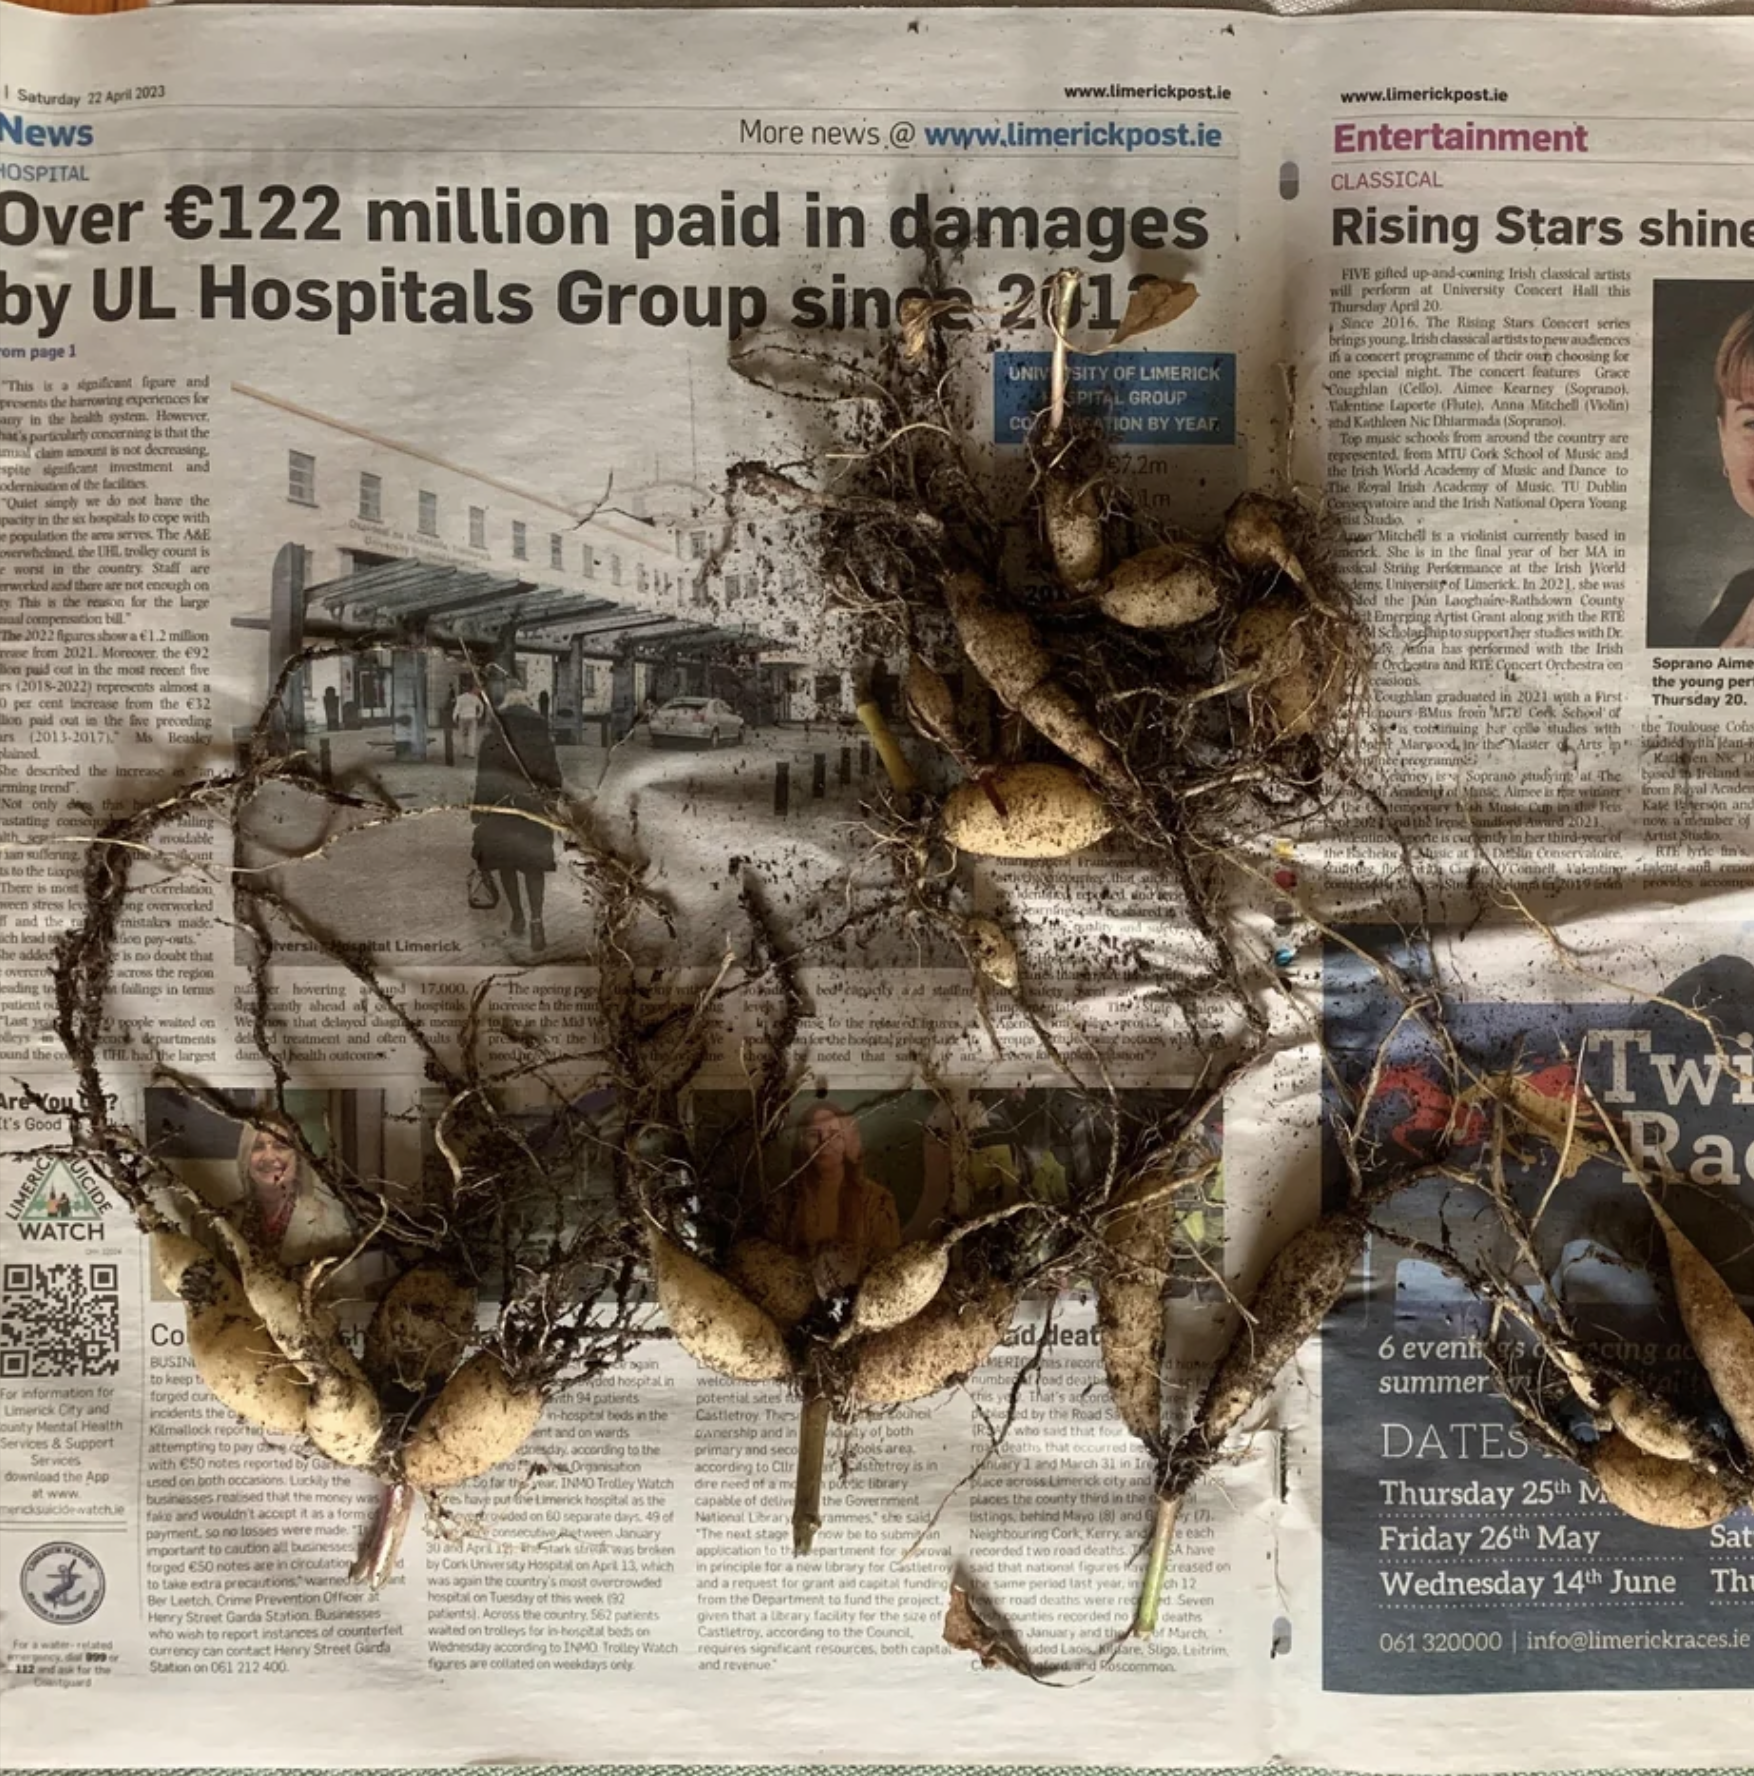 Simply place your Caladium bulbs (known as 'tubers') on an old newspaper and wrap them up loosely with string. Not too tightly, just enough so you can still slide your finger in between the bulb and the paper! Credit: Reddit
Step 2: From mid March (or mid September for southern-hemisphere countries), pot the plant back into its original pot with a fresh batch of 'Houseplant' potting mix. Plant the bulb around 8cm (3 inches) into the soil and over it fully with soil. Keep the potting mix moist and provide a sunny, bright windowsill. You can also keep the potted bulb on an operating radiator until leaves begin to emerge, before placing it into a window. Keep the soil moist and feed every three waters using a 'Houseplant' labelled fertiliser once the first leaf begins to emerge from the soil.
And there you have it! Caladiums need a little extra work due to their dormancy needs, but as long as you give them this hard-earned rest outside of soil, they'll come back each year!
Origins
Caladium is a genus of flowering plants consisting of fourteen species and over a thousand cultivars. Despite originating from South America, it has recently been introduced into other tropical locations around the world, including Africa, Asia and northern Australia. Caladium was first described back in 1800 by Étienne Ventenat, during a visit to rainforests of South America. During the southern-tropics dry season (usually March to October), many Caladiums will go dormant by reducing their leaf-count to almost none, in an attempt to avoid severe dehydration.
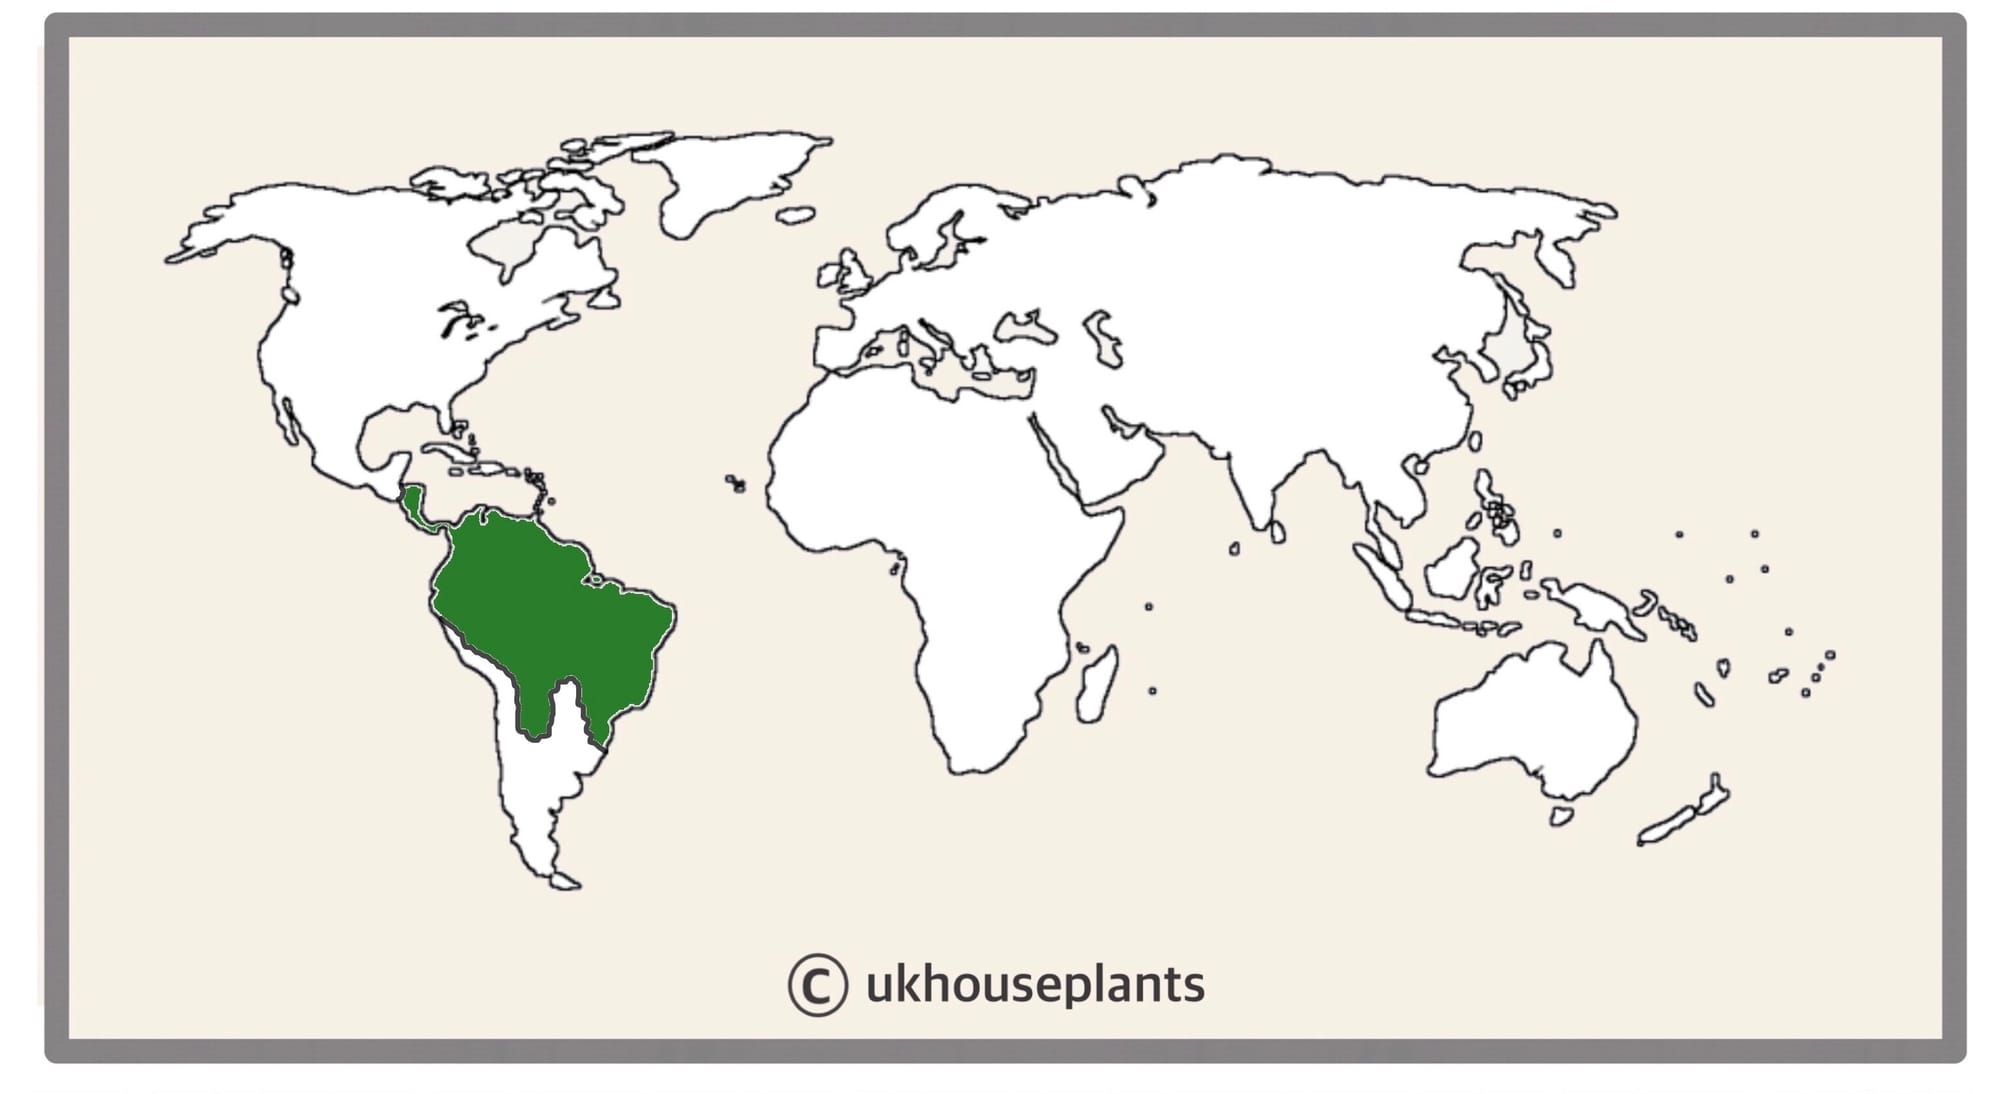 The Distribution of Caladium
Temperature
10° - 30°C (50° - 86°F)
H1b (Hardiness Zone 12) - Can be grown outdoors during the summer in a sheltered location with temperatures above 12℃ (54℉), but is fine to remain indoors, too. If you decide to bring this plant outdoors, don't allow it to endure any direct sunlight as it may result in sun-scorch and dehydration. Regularly keep an eye out for pests, especially when re-introducing it back indoors.
Spread
Over 0.7m in height and 0.5m in width once they reach maturity. The ultimate height will take between 5 - 10 years to achieve with several new leaves per season. There'll be a fluctuation of the number of leaves throughout the season, with a limited amount during their dormancy period in the height of winter.
Pruning & Maintenance
Remove yellow or dying leaves, and plant debris to encourage better-growing conditions. While pruning, always use clean scissors or shears to reduce the chance of bacterial and fungal diseases. Never cut through yellowed tissue as this may cause further damage in the likes of diseases or bacterial infections. Remember to make clean incisions as too-damaged wounds may shock the plant, causing weakened growth and a decline in health.
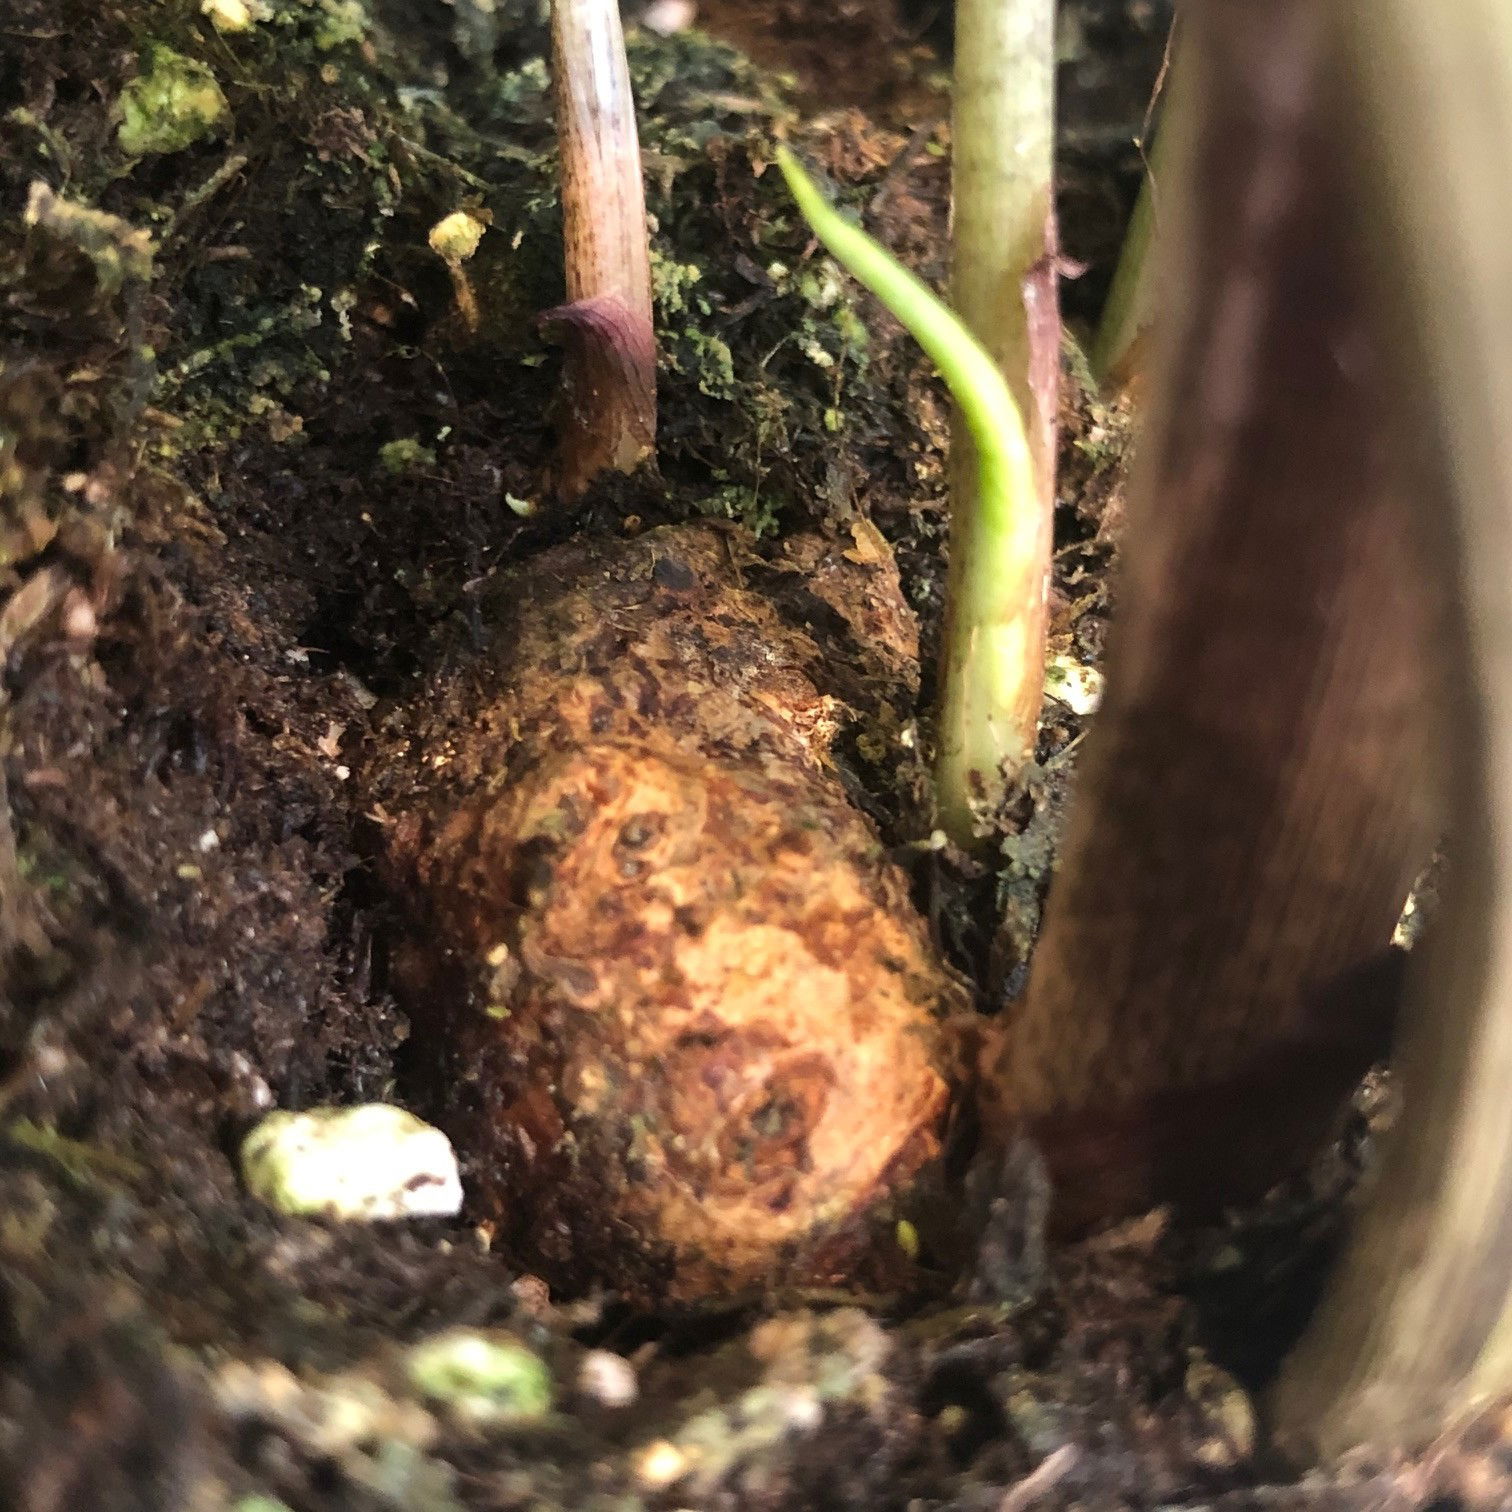 The tuber of a Caladium. These bulb-like modified stems are the storage organ for the genus, where it'll withhold nutrients and moisture, along with the foliar node itself.
Propagation
Via Seed or Offset Tuber Division.
Tuber Division (Moderate) - Your plant will produce several tuberous offsets (similar to potatoes) that can be separated once they have a sufficient root system and surpass 3cm (1.1 inches) in diameter. Water the soil 24hrs before the main event to reduce the risk of transplant shock - when its dry root systems are over-fingered. Take the plant out of its pot and place your fingers close to the nodal junction between the two tubers - compost may have to be removed for better access. Push the chosen offset downwards until you hear a snap. Separate its foliage and root system away from the mother plant, mentally noting the high risk of damage. Transplant in the appropriate sized pot with a fresh batch of 'Houseplant' soil. Maintain evenly moist soil and situate it in a bright, indirect location away from any direct sunlight. After four weeks of solid foliar growth, treat it like a standard specimen, following the care tips above!
Flowers
As Caladiums are part of the Araceæ family, their blooms aren't showy. Much like a Peace Lily's flower body, their flowers consist of a white or green spathe (the spoon-like shell) with the spadix being the site pollination. Blooms can last up to five days and are usually visible during late spring or early summer around 30cm+ from the soil line; however, achieving a flower is highly unlikely indoors.
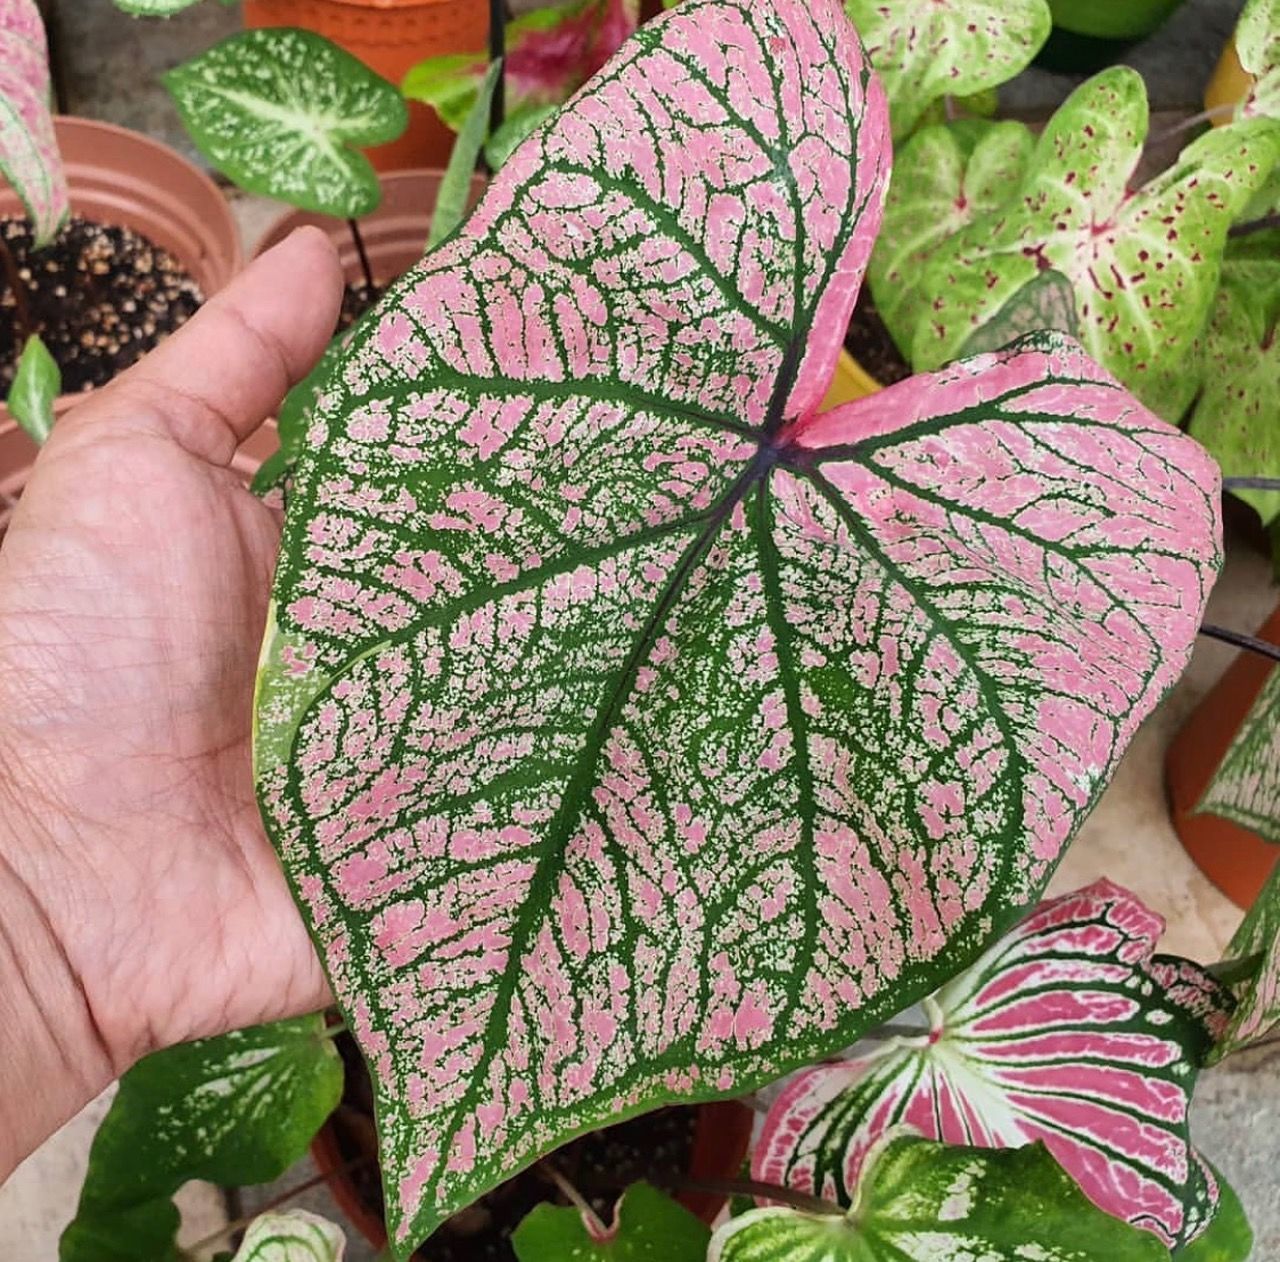 Caladium 'Spring Fling'. Copyright: Plantjamin
Repotting
Repot every three years in the spring, using a 'Houseplant' labelled compost and the next sized pot with adequate drainage. Hydrate the plant 24hrs before tinkering with the roots to prevent the risk of transplant shock. For those that are situated in a darker location, add a thin layer of small grit in the pot's base to improve drainage and downplay over-watering. Click here for a detailed step-by-step guide on transplantation, or via this link to learn about repotting with root rot.
Book a 1-to-1 video call with THE HOUSEPLANT DOCTOR™ if you'd like a personal guide to repotting your houseplant. This will include recommending the right branded-compost and pot size, followed by a live video call whilst you transplant the specimen for step-by-step guidance and answer any further questions!
Pests & Diseases
Keep an eye out for mealybugs, aphids, spider mites, scale & thrips. Typical diseases associated with this genus are leaf-spot disease, rust, botrytis & root/tuber rot. Click on this link for further information about how to identify and address any of these issues.
Toxicity
This plant is classified as poisonous due to varying concentrations of calcium oxalate crystals found around the plant's body. If parts of the plants are eaten, vomiting, nausea and a loss of appetite could occur. Consumption of large quantities must be dealt with quickly; acquire medical assistance for further information.
Retail Locations
By purchasing bare Caladium tubers online, you can bypass the extra fee for its initial cultivation and transportation costs.
Book a 1-to-1 Call with THE HOUSEPLANT DOCTOR™
If you need further advice with your houseplants, book an advice call with ukhouseplants' friendly and expert writer today! This can be done via a video or audio call on most apps, including Facebook, FaceTime & Skype. A ten-minute call costs £5.99 (US$7), or £15.99 for thirty minutes. You can ask multiple questions, including queries on plants, pests, terrariums, repotting advice and anything in between. Please consider supporting this service to keep ukhouseplants thriving!