Planococcus ssp.
Contents
- Top Tips & Info
- Symptoms
- Susceptible Plants & Parts
- Actions Needed
- Hot Water or Hydrogen Peroxide?
- Ways to Prevent an Attack in the Future
Need the answer to a specific plant or pest query? Book a 1-to-1 video call with THE HOUSEPLANT DOCTOR™, the website's friendly author, to overcome and address your niggling problem! Available on iMessage, WhatsApp, Facebook Messenger & more.
Top Tips & Info
- Eradication Difficulty - Moderate
- Life Cycle - Up to fifty-five days.
- The female can lay up to fifteen eggs a day - two hundred in total.
- Root mealybugs, as the name suggests, will attack the plant's lower portion, sucking out its sap and stored nutrients.
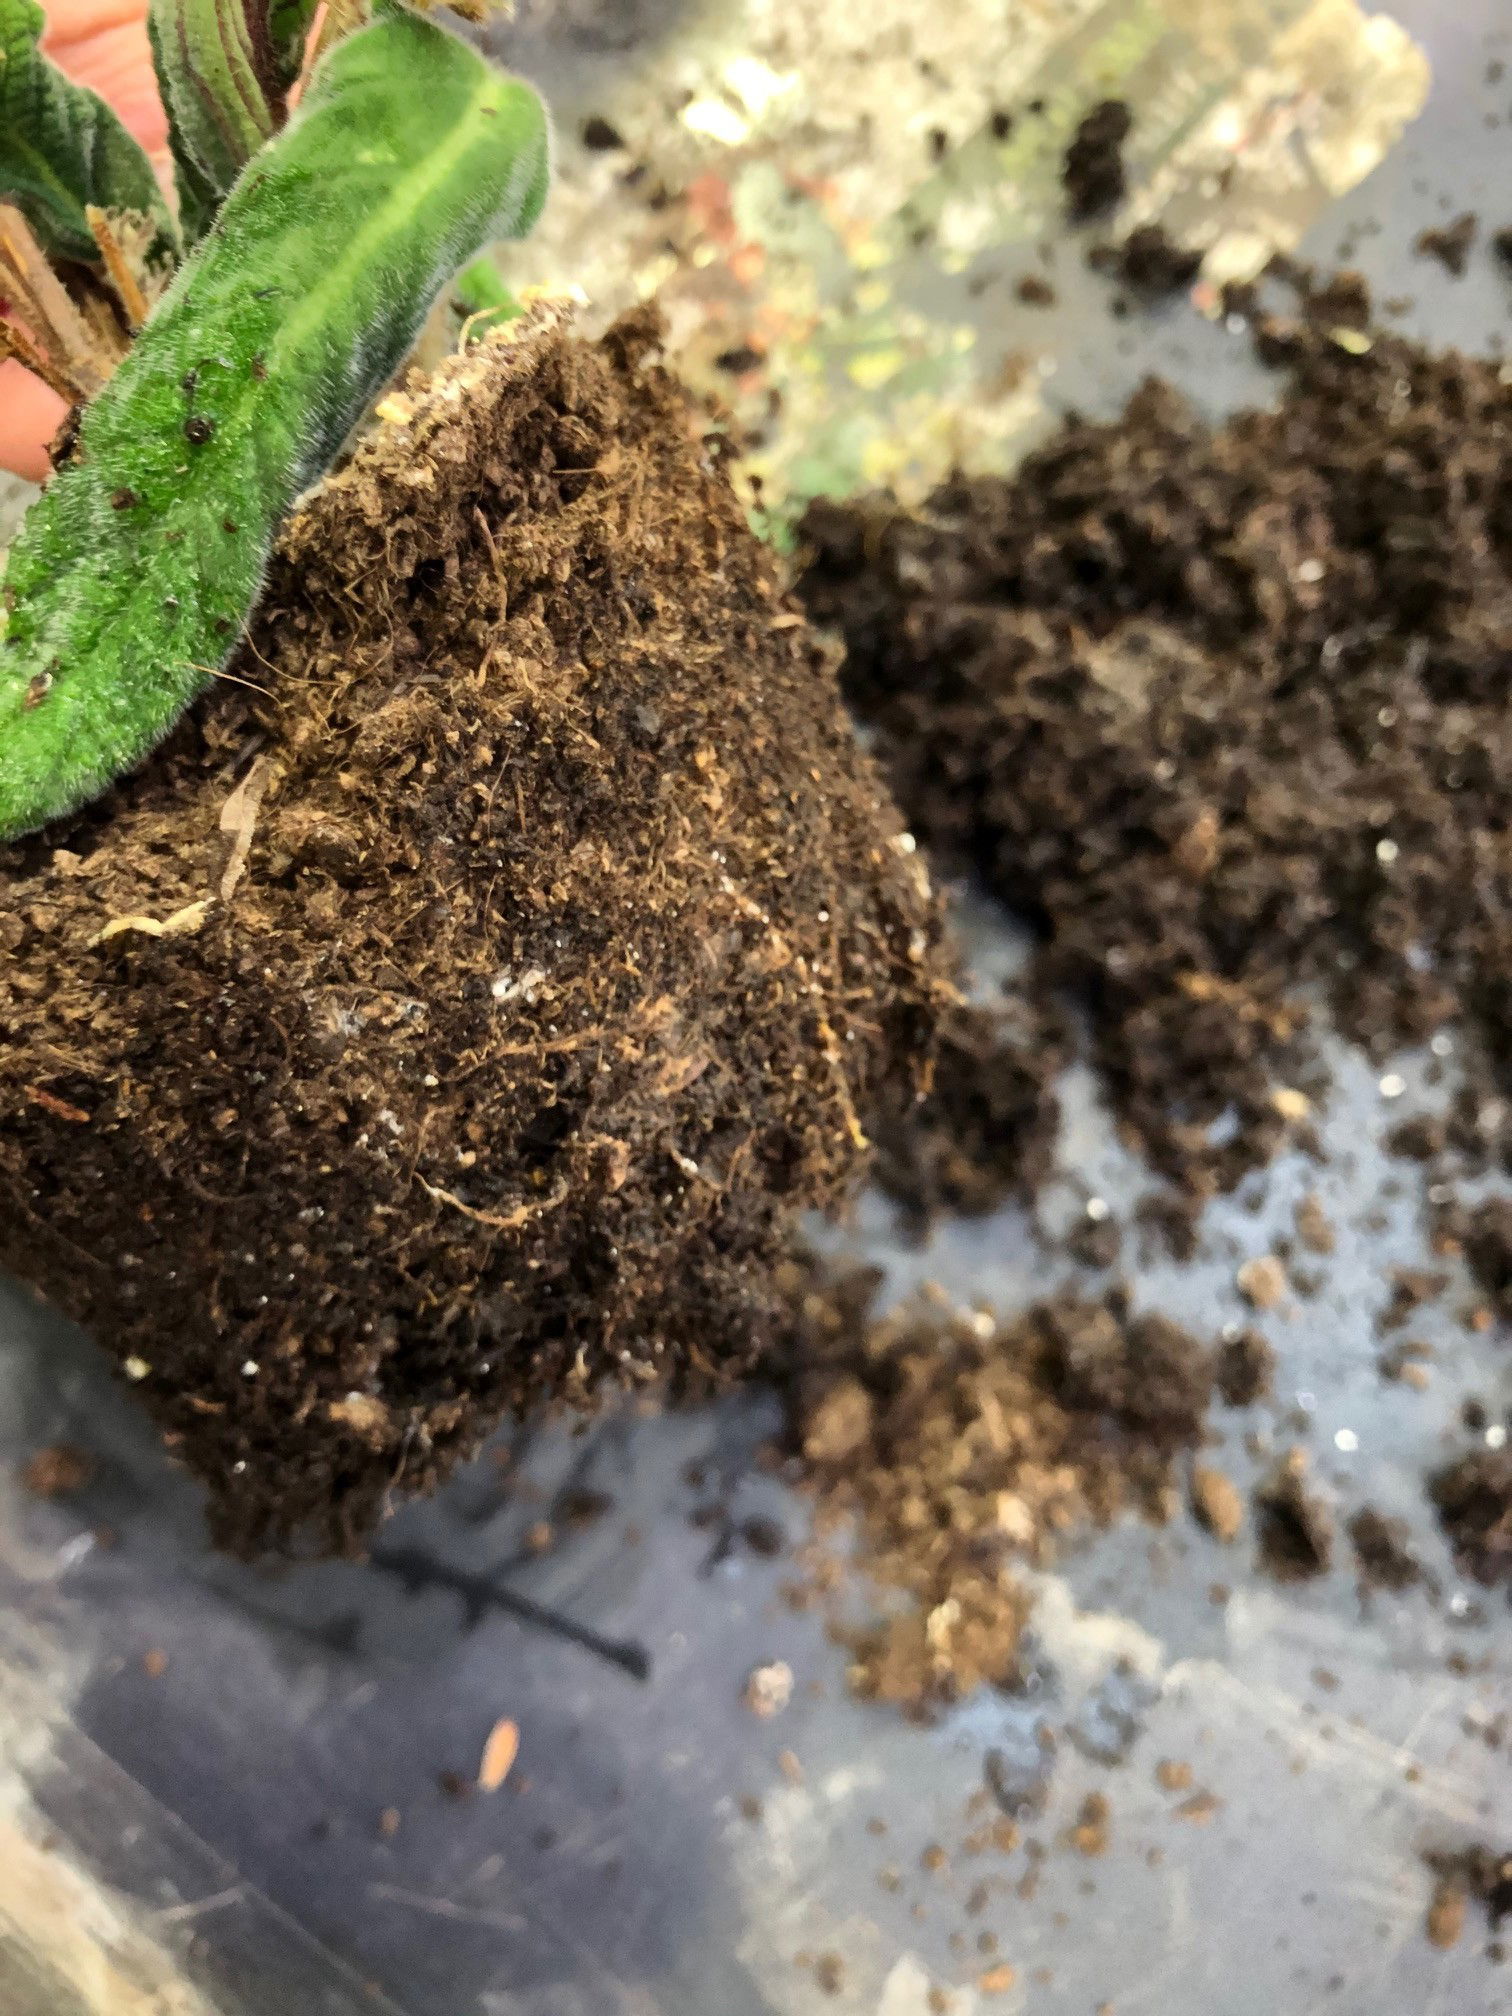
- Symptoms include wilting or yellowing leaves, and white colonies developing in the soil (pictured above).
- They can be brought into the home by contaminated soil and will stay localised to the specific pot they're infesting.
- Remove as many bugs as possible with your fingers, avoiding Transplant Shock by not tinkering with the healthy roots. Repot the plant using a good quality potting mix and the same (or next-sized) plastic pot, depending on how much soil you remove. Remember that we sell some of the best quality indoor composts online, via our shop.
- Once repotted, water the plant using near-hot water when it's time for another hydration. If it burns your feet, it's too hot for the plant!
- For those needing something more substantial, try pouring Hydrogen Peroxide into water (diluted at the manufacturer's recommendation); this will oxygenate the soil (highly beneficial) along with killing off any bugs that inhabit in the compost.
What are the Symptoms of Root Mealybugs on Houseplants?
Although there are little signs to an infestation above the soil line, the plant will begin to wilt and turn yellow after a while. Root mealybugs thrive off healthy plant tissue, so it's vital to catch it early. When investigating the compost, an infestation can easily be spotted; the mother bugs will secrete a white cottony substance to cover her, and the surrounding soil for the protection of her eggs. The larvae, which are located in the cotton, will hatch within forty-eight hours of being released. Root mealybugs look mostly similar to its above-soil counterparts, just a lot smaller.
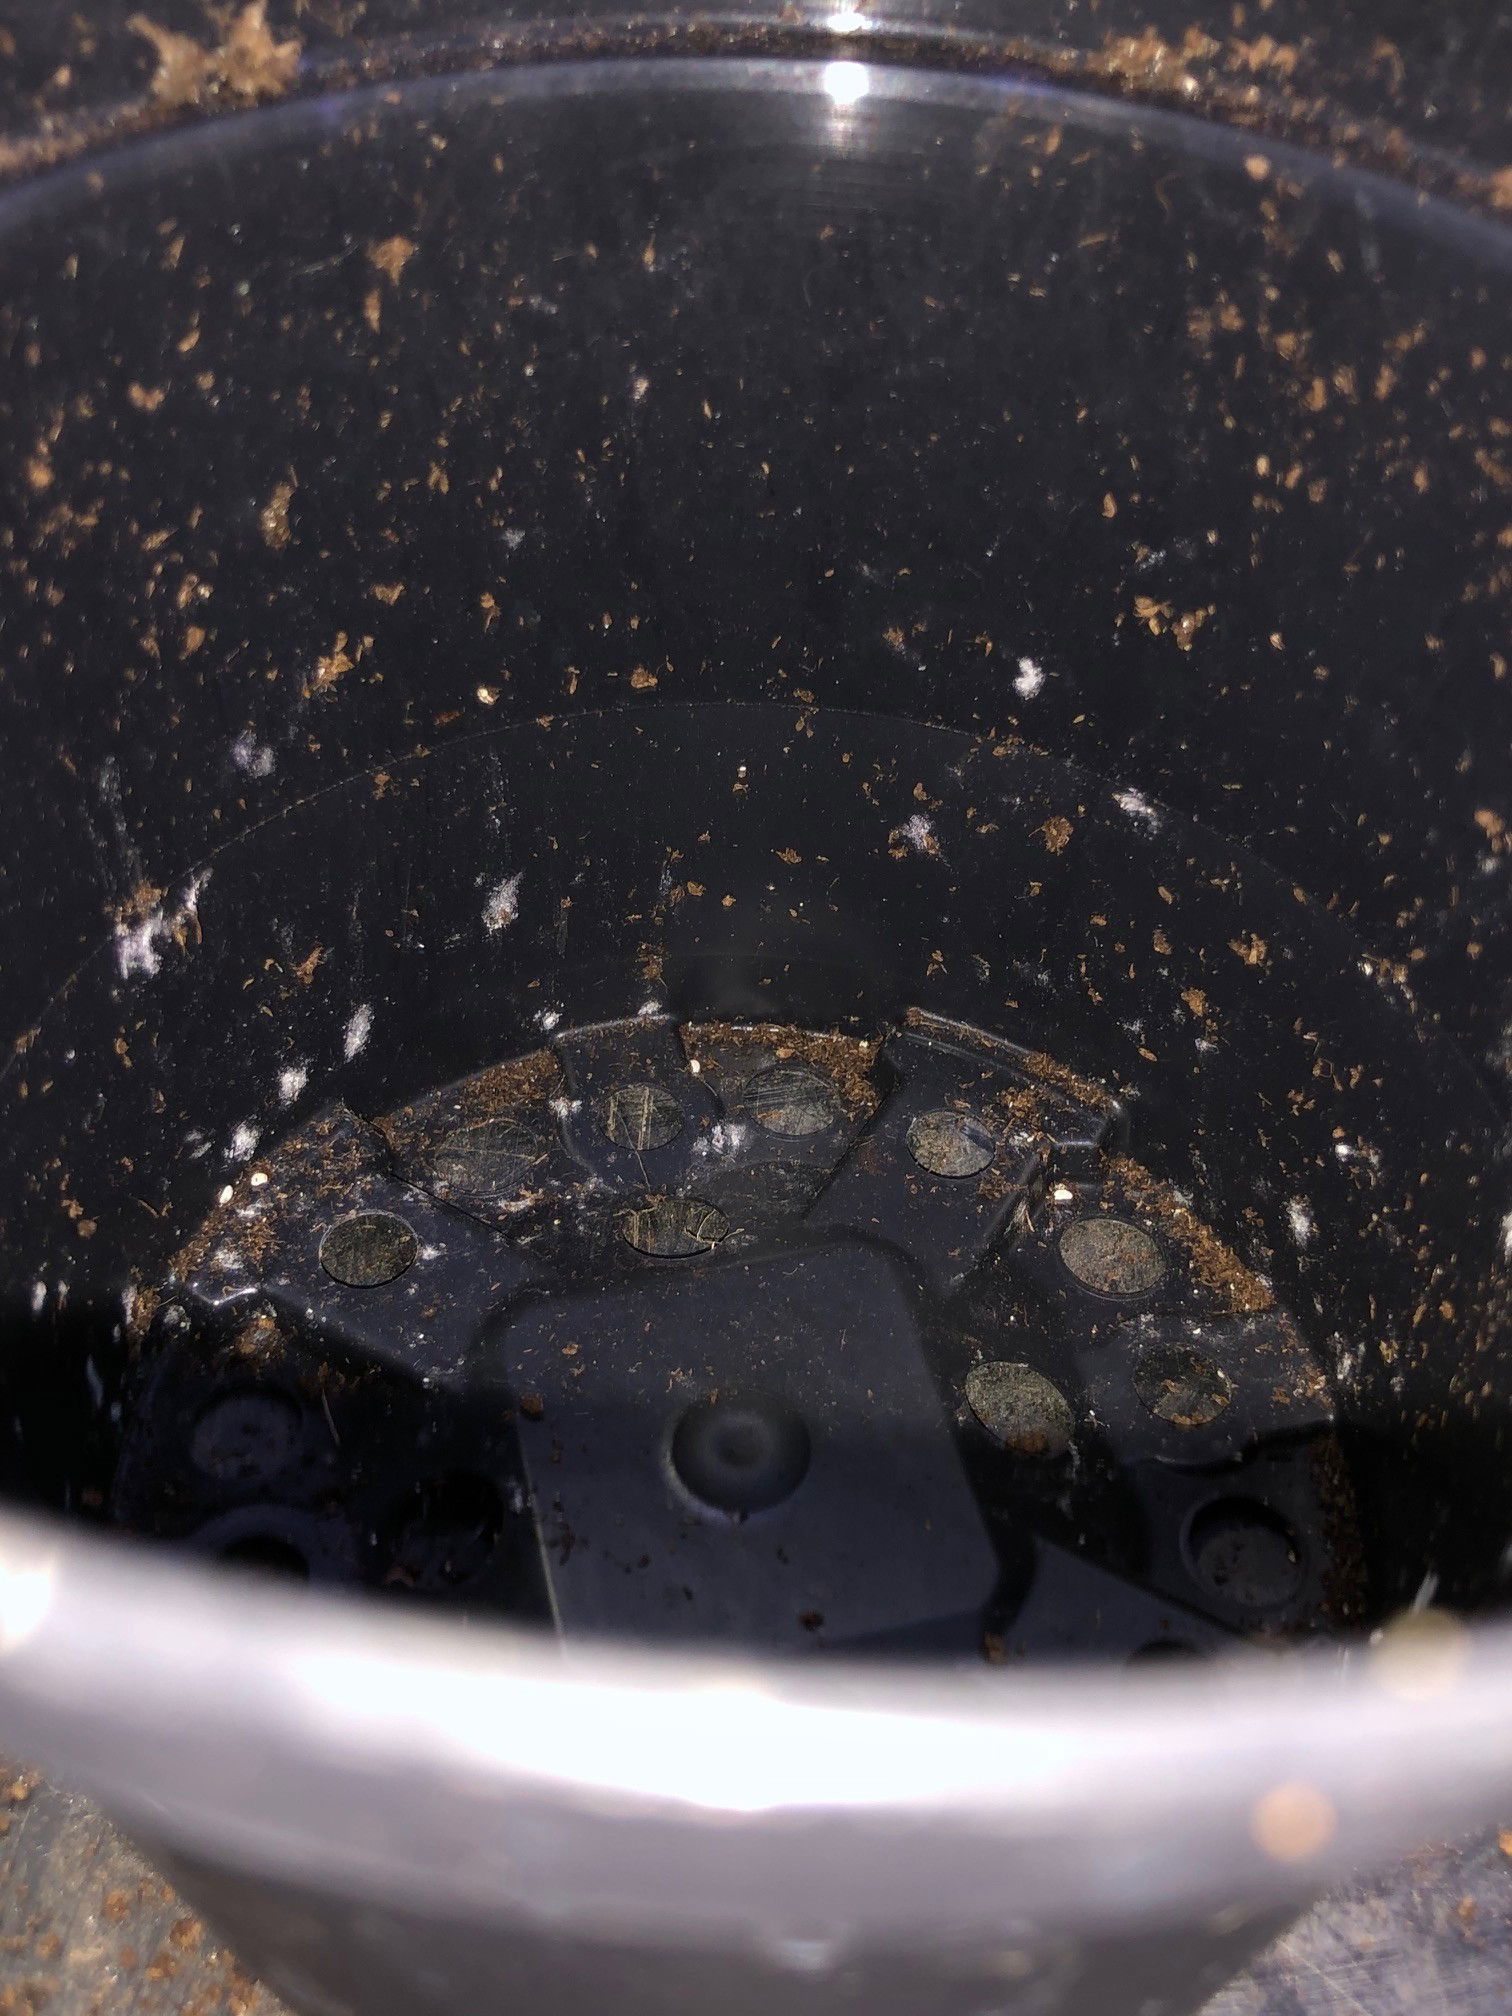
 Root Mealybugs can attach themselves to the inside of the pot, as seen with these white markings. This is why it's very important to clean the pot before re-using it again for a transplant.
 Never remove all of the roots from the soil as it may result in transplant shock In this image, we have removed the lower quarter of the rootball but have decided not to disturb any further roots in the upper portion of the soil.
What are the most Susceptible Houseplants & Where do Root Mealybugs live on them?
Within the soil, they'll attack the roots and other organic matter (i.e. bark, coir) in the compost.
Plants - All species are susceptible to Root Mealybugs, including Begonia, Ferns & Streptocarpus.
What are the Actions Needed to Eradicate Root Mealybugs?
Before sifting through the soil, the first thing to do is hydrate the plant. Over-touching a dry rootball will bring nothing but grief in the form of transplant shock that'll result in wilted, yellow leaves.
A few hours after watering, take the plant out of its pot and inspect the perimeter of the soil - crush each bug or colony as they become visible. Gently tease away the bottom third of the compost and carry on the search. As it's essential to respect the roots, refrain from unearthing all of its root system if possible. If you can't remove all of the bugs, don't worry as the hot water or Hydrogen Peroxide will take care of the rest!
Before placing the plant back into its original container, have a scan over the pot, too. As you can see on the next image, the bugs can attach themselves to the nooks on the inside, potentially bypassing the initial inspection. Wash the pot using warm water and dish soap to destroy any remaining inhabitants.
Replace the affected soil with a fresh batch of the appropriate potting mix. If you need help choosing the right mix for your plant, send us a message to be pointed in the right direction!
Once the plant is back in its pot, don't tinker with the roots again unless the symptoms progressively get worse. The final step to eradicate Root Mealybugs is to choose between using hot water, Hydrogen Peroxide or predatory mites.
The Final Step: Choose How to Eradicate Root Mealybugs
Option 1: Hot water (49℃, 120℉)
Using near-hot water to scald the pests is an effective and cheap way to control the population. Boil the water and hydrate the soil as you would with regular irrigation. This step will aid plant hydration, so always be careful of over-watering. Repeat every three irrigations, making sure the fluid is slightly on the hotter side, but still cool enough to dip your fingers in it. There was a study conducted by the 'University of Hawaii College of Tropical Agriculture & Human Resources' who found a 100% success rate for the eradication of Root Mealybugs, with little to no damage to the roots.
- Pros - Cheap, quick & chemical-free.
- Cons - May take longer to eradicate & can quickly burn the roots if too hot.
Option 2: Hydrogen Peroxide
As the first method will take several weeks to eradicate, you may want to consider spending some money on 'Hydrogen Peroxide'. Now, before you rush to your local garden centre, this chemical is mostly found online, so have a shop around for the best deal here. For every three irrigations, incorporate a splash of the peroxide into its with to administer the pesticide. You'll have to do this for at least three times to stop the chance of a relapse thoroughly. Always follow the manufacturer's recommended dosages as Hydrogen Peroxide can become detrimental to the plant when over-used. If you're worried about killing your plant, use the hot-water trick!
- Pros - Works immediately, relatively cheap & available online all the time.
- Cons - Potentially detrimental if over-used.
There are other pesticides such as 'Imidacloprid', but has been subsequently banned since January 2023 in Europe.
Option 3: Predatory Mites
Releasing Predatory Mites on your affected houseplant's soil is a more natural approach to controlling the infestation. We recommend doing your own research on which Mites work for you, as there are many around to purchase. Have a look at this article to learn more about some research conducted in America.
What are the Ways to Prevent a Root Mealybug Attack in the Future?
1. When buying a new plant from a local plant shop or garden centre, check around the common areas for infestations like the top layer of its soil. Most Root Mealybug issues come from already-affected plants, so always keep this in mind when increasing your plant-collection!
2. Change the top layer of the soil when bringing any new plant from a shop. Replacing the top layer of the compost will remove any larvae that may have fallen in, or been deposited by a pest. THE HOUSEPLANT DOCTOR™ does this religiously whenever a new plant enters the house!
3. Perform monthly checks for pests on your own plants. Although this may sound patronising, many gardeners forget to inspect their indoor specimens and that's exactly when an infestation can arise. Take the plant out of its pot and look around the outer edge of the rootball. Do not touch or disturb the root system and instead just scan the rootball. Take action in cases of symptoms.
4. Store your bags of compost by keeping them tight and enclosed, out of dry or damp areas. Never use soil that has been left outside for any length of time, due to the very high risk of contamination of pests.
Book a 1-to-1 Consultation with THE HOUSEPLANT DOCTOR™
Need realtime advice for your Root Mealybug infestation? Book a video or message consultation with expert Joe Bagley, THE HOUSEPLANT DOCTOR™ (author or ukhouseplants.com). Choose between a ten or thirty-minute session & a platform of your choice (WhatsApp, FaceTime, Facebook Messenger or Zoom). Ask unlimited questions in one session, including queries on your dying/challenging plants, pests eradication, terrariums, repotting advice & everything in between! Available worldwide.